Introduction #
For Cloud8 to connect to AWS providers, you must provide the necessary credentials to the Platform. There are currently two ways to do this:
- IAM Role (recommended) – Create a role with explicit permissions for the AWS account used by Cloud8.
- IAM Access Key (alternative) – Simply create an IAM user of the “Programmatic Access” type and a custom security policy that meets your business needs and processes.
We recommend that the first role you configure be in a “Management account” type. The role configuration procedure described below should be repeated for all accounts in the Organization.
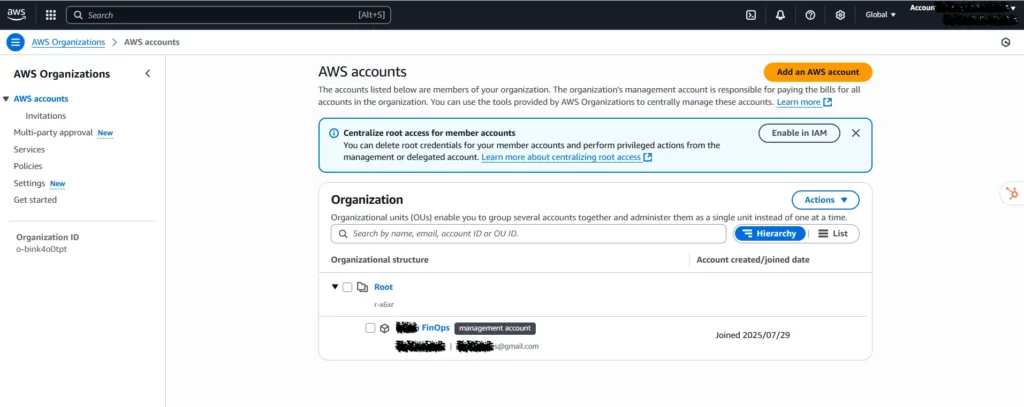
Before you begin configuration, we recommend changing the language settings to EN-US to make it easier to identify the properties you’ll be configuring. In the top bar, select the gear icon (Settings) and change the language to English (US).

Integrate an AWS Account Using IAM Role #
In this article, we’ll walk you through the steps to create an IAM role. We suggest opening a notepad to jot down the information required to connect your provider to Cloud8. Be prepared to write down the following information:
- AWS ACCOUNT ID (management account)
- ROLE NAME
- ROLE ARN
- EXTERNAL ID
- CUR Export Name
- CUR Bucket S3
- CUR Bucket S3 Path Prefix
Step 1 – Create a new Role in the AWS Console #
Click on “Create role”.

Step 2 – Select Trusted Entity #
On the next screen, select AWS account as the “Trusted entity type.”

In the section below, specify that another AWS account will have access to this role. Select the “Another AWS account” option and enter the Cloud8 ID: 693155863762. Select the “Require external ID” option and set the value to External ID. Write down the “External ID” in notepad for later use.
Then click “Next.”

Step 3 – Add permissions #
Now it’s time to add permissions to this role, granting access to specific areas of your AWS account. The minimum policy Cloud8 requires is “ReadOnlyAccess.”
If you’re having trouble identifying the policy, sort the policy name column alphabetically, and the “ReadOnlyAccess” policy will be at the top.
Then click “Next.”

Step 4 – Name the role and review permissions before publishing. #
We suggest using the following naming convention: cloud8-role. Write down the “Role Name” in Notepad. Then click “Create role.”

That’s it! Your Role has been created and can be viewed and edited directly in the Console.

Click on the created role to view its information. Note the “Role ARN” in the notepad.

Step 5 – Configuring the provider in Cloud8 #
In the left-hand side menu, select “Providers.” Click “New” and fill in the required fields with the data generated in the previous steps.
- Provider name: The name that will be used to identify the provider in Cloud8.
- Timezone: The local time standard that will be used.
- Language: The default language.
- Default location: Choose the most popular or most frequently used location for your account; we will scan all regions and zones regardless.
- IAM Role ARN: The role ARN created in Step 4.
- External ID: The external ID created in Step 2.
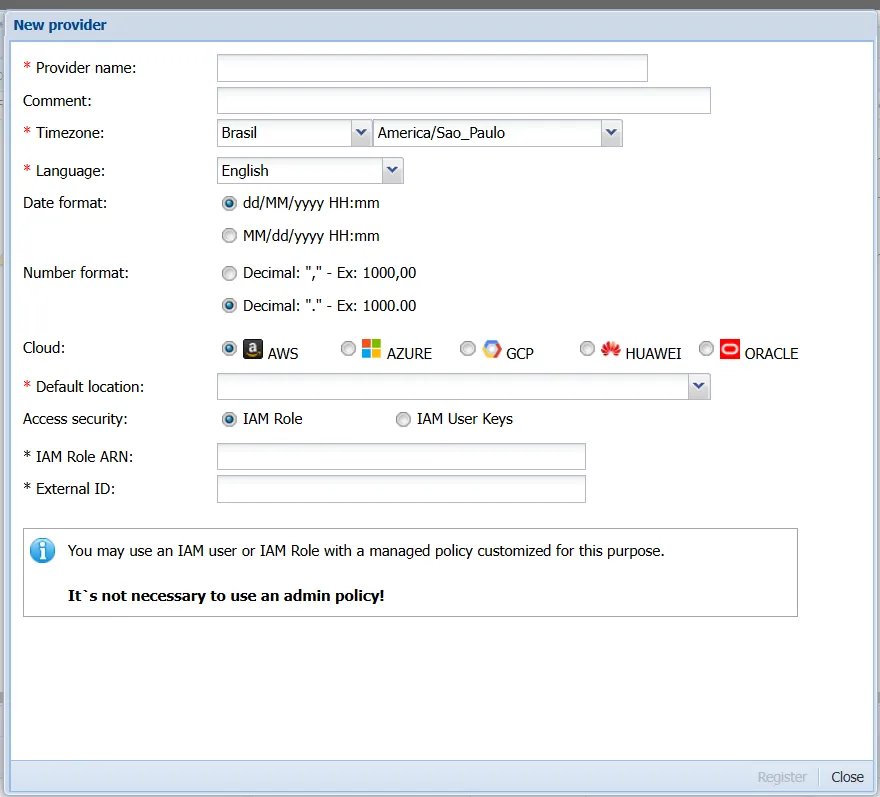
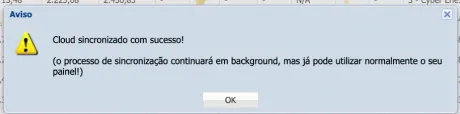
Click “Register” and wait for the data to synchronize.

Integrate an AWS Account Using IAM User Key #
In this article, we’ll walk you through the steps to generate an IAM User Key. We suggest opening a notepad to jot down the information needed to connect your provider to Cloud8. Be prepared to write down the following information:
- AWS ACCOUNT ID (management account)
- ACCESS KEY
- SECRET ACCESS KEY
- CUR Export Name
- CUR Bucket S3
- CUR Bucket S3 Path Prefix
Step 1 – Create an Access Key in the AWS Console #
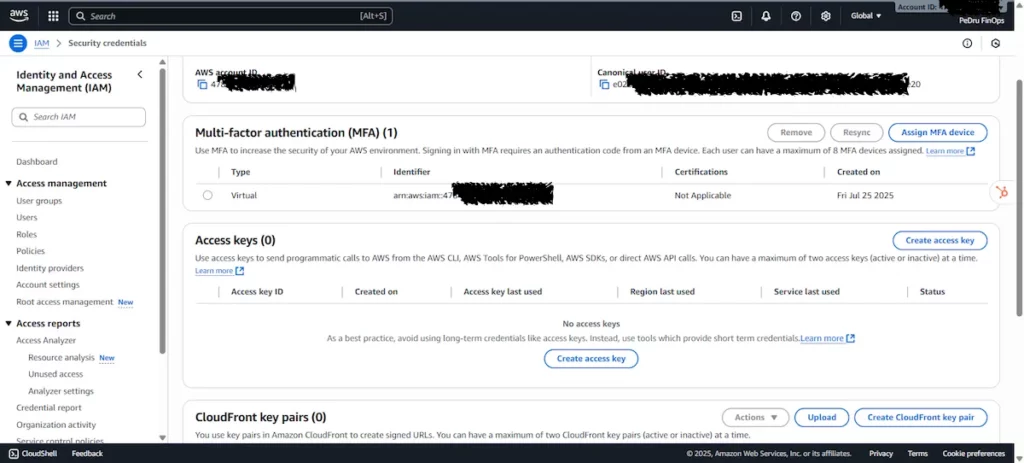
Access the AWS Console, click on the user menu (top right corner) and select the “Security credentials” option.

On the next screen, look for the “Access keys” section and click “Create access key”.
Once you have created the Access Key and the respective Secret access key, write down this information in a notepad.
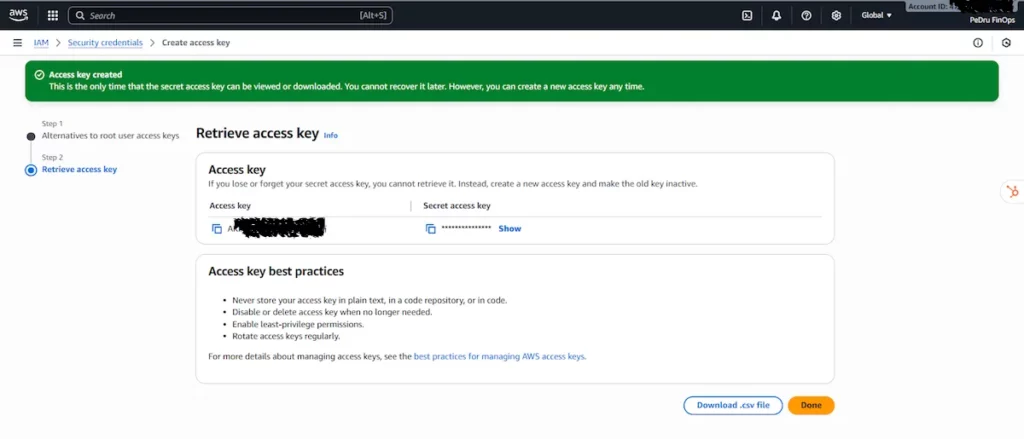
We recommend downloading this data by clicking “Download .csv file.” Then, complete this step by clicking “Done.”
Step 2 – Configuring the provider in Cloud8 #
In the left-hand side menu, select “Providers.” Click “New” and fill in the required fields with the data generated in the previous steps.
- Provider name: The name that will be used to identify the provider in Cloud8.
- Timezone: The local time standard that will be used.
- Language: The default language.
- Default location: Choose the most popular or most frequently used location for your account. We will scan all regions and zones regardless.
- Access Key: The access key created in Step 1.
- Secret Key: The secret access key created in Step 1.
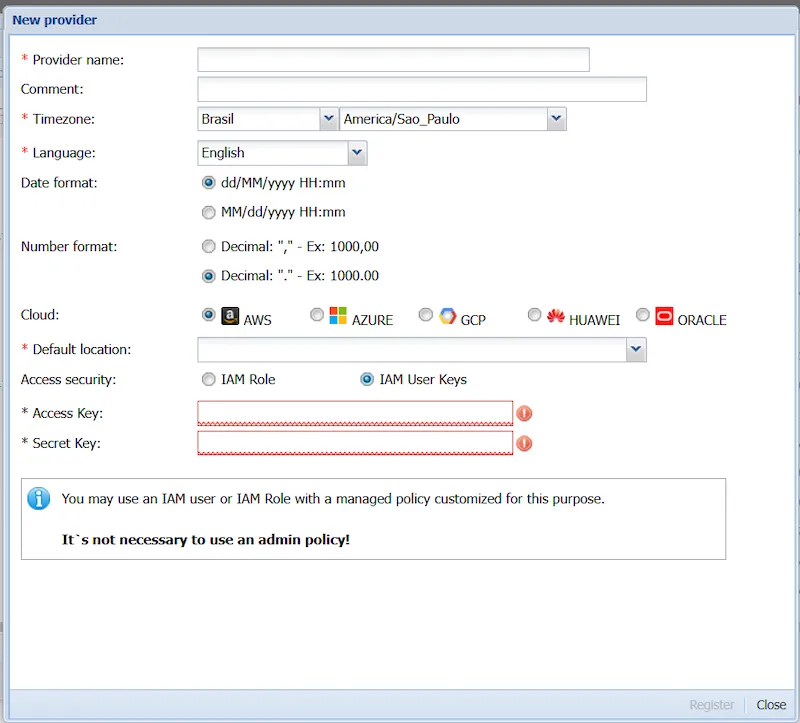
Click “Register” and wait for the data to synchronize.

Next Steps #
Enabling ECS and EKS Split Cost #
In the AWS Portal, search for Billing and Cost Management in the search bar. In the left-hand menu, select Cost Management Preferences under the Preferences and Settings tab.
Select the Amazon Elastic Container Service (ECS) and Amazon Elastic Kubernetes Services (EKS) options under Split cost allocation data. Under Rightsizing, select Enable Rightsizing recommendations.
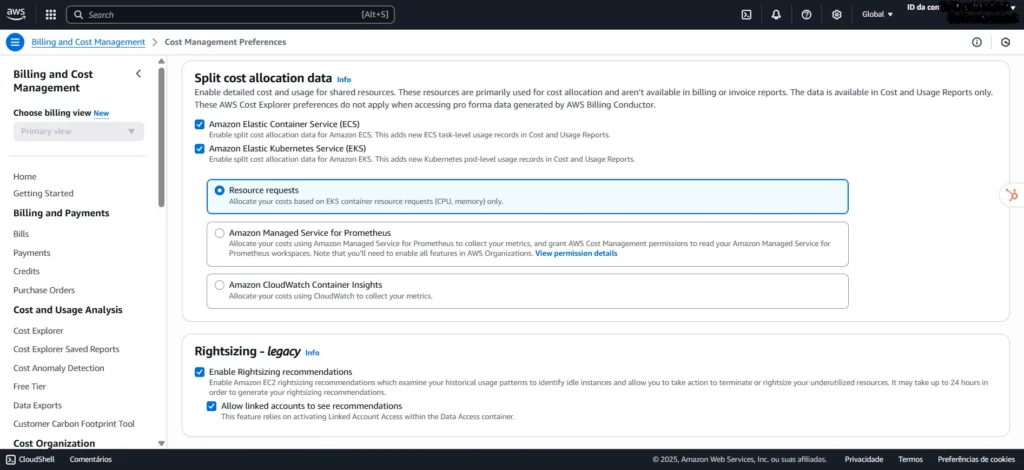
This Billing and Cost Management setting is essential for improving visibility and cost control in environments using ECS and EKS. By enabling the Split cost allocation data option for these services, expenses are broken down more granularly, allowing you to clearly identify which resources and workloads are consuming the most budget within your clusters.
Enabling the Enable Rightsizing recommendations option ensures that AWS automatically provides instance size adjustment suggestions, helping you identify optimization and cost reduction opportunities without compromising performance. Click “Save Preferences.”
Cost History Backfill: #
Creating a CUR will load data from the first day of the month in which it was created. Therefore, if you created it in the current month, you won’t have access to the history of previous months. You’ll need to open a ticket with AWS requesting backfill for previous months. You must wait 24 hours after creating the CUR and provide the required data, such as Account ID, Export Name, Bucket, and S3 Path Prefix.
In the ticket, specify:
- S3 bucket name
- S3 Prefix used
- CUR export name
- Desired backfill period (start and end dates)
- Explain that you need to backfill historical data to the new CUR.
Below is a sample text for opening a backfill request in AWS, adapted for the context of a Cost and Usage Report (CUR) history request:
Subject: Request to Backfill Historical Data in the AWS Cost and Usage Report (CUR)
Description:
Dear All,
I am requesting to backfill historical data for the newly configured Cost and Usage Report (CUR) in our AWS account. The goal is to ensure that all previous usage and cost data is available in the newly configured bucket.
Configuration Details:
S3 Bucket: [BUCKET_NAME]
Prefix: [PREFIX_USED]
CUR Export Name: [EXPORT_NAME]
Desired Backfill Period: [START_DATE] to [END_DATE] (we recommend requesting history from January of the previous year to have at least a full calendar year)
The CUR is already active and the first file was successfully published. We would like to request that AWS publish the historical data for the above period to this new CUR.
If you need to make any additional configuration adjustments or send additional information, please let us know.
Thank you in advance for your support.
Sincerely,
[Your Name]
[Your Contact]
Setting up Cloud8 FinOps Analytics for AWS #
FinOps Analytics is configured by connecting to an S3 bucket that receives usage and cost data via CUR.
Configuring Billing Export (CUR) on AWS #
A Cost and Usage Report (CUR) is a set of detailed usage and cost data. It’s used to export billing data to an S3 bucket, enabling full integration with the Cloud8 tool. It’s possible to request a backfill of data from periods prior to the CUR’s creation, providing a historical view of AWS provider consumption.
Prerequisites #
Have administrative access to the Organization’s Management Account.
Setting up a new CUR file #
In the AWS Portal, search for Cost and Usage Reports in the search bar. Then click Create.

Then select Legacy CUR export.
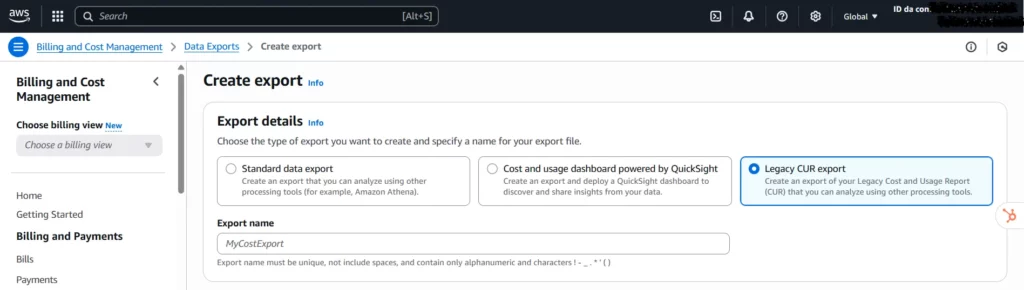
- Export name: Name the report and write it down in notepad.
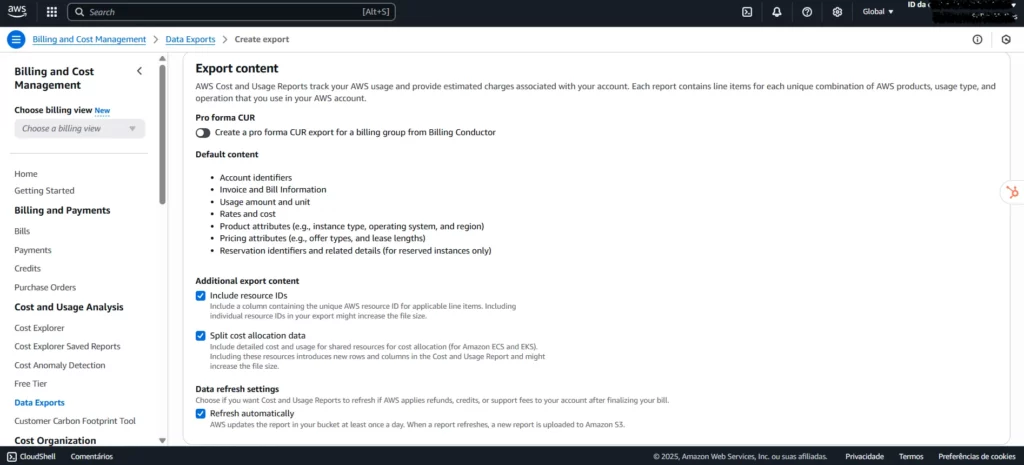
- Select the “Include resource IDs” option.
- Select the “Split cost allocation data” option.
- Select the “Refresh automatically” option.
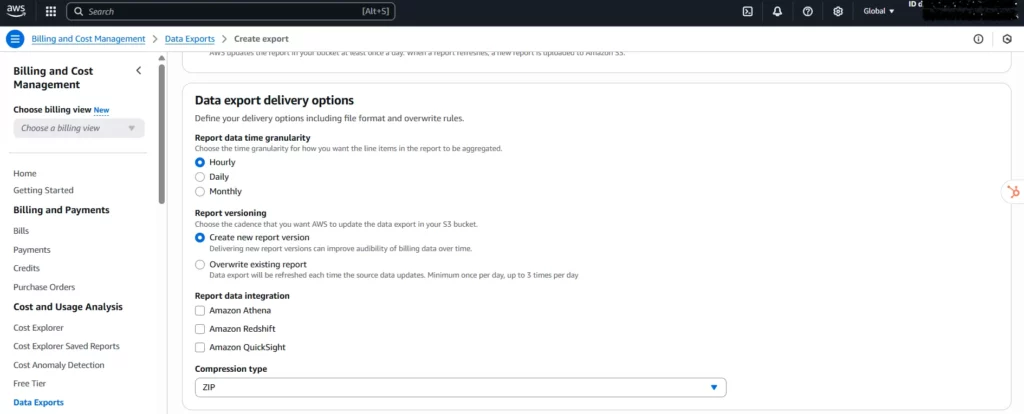
In the “Data export delivery options” configuration, make the following settings:
- Report data time granularity: The period required to aggregate data in the report, which can be hourly, daily, or monthly (not recommended). The “Hourly” setting is recommended.
- Report versioning: Define whether the most recent versions of the CUR replace previous versions or are delivered together with the previous versions. “Create new report version” is recommended.
- Report data integration: You can leave this setting unselected if you do not want to use tools such as Athena, Redshift, or Quicksight.
- Compression type: Select ZIP or GZIP.
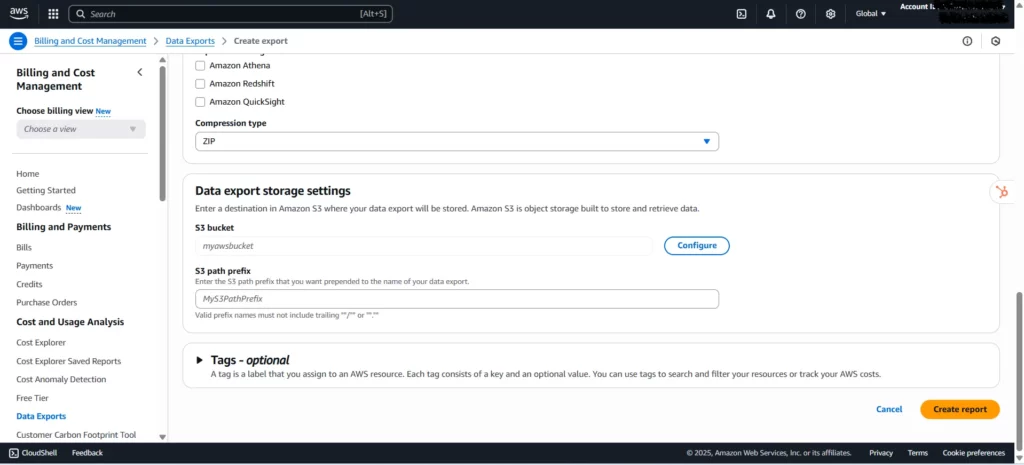
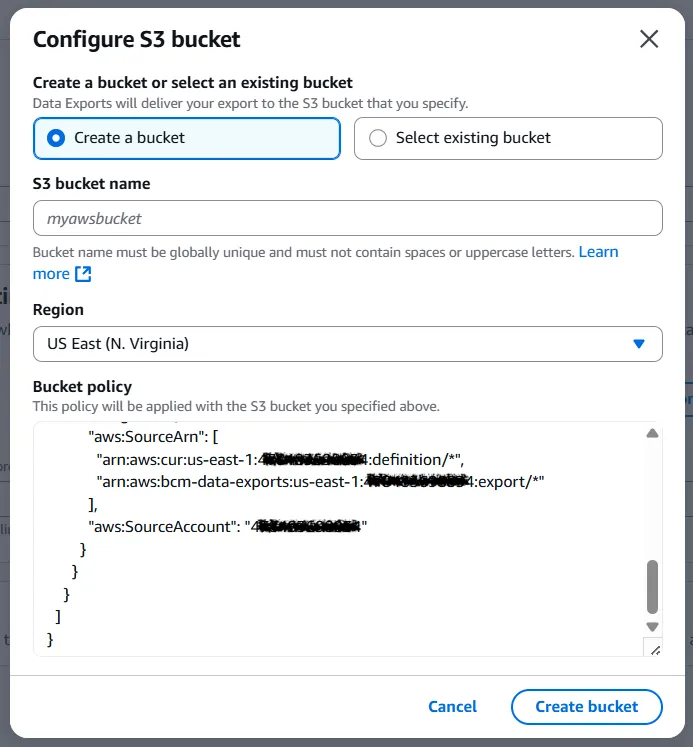
Under Data export storage settings, click Configure. If you choose to create a new bucket, fill in the “S3 bucket name” and select a “Region.” We suggest using the name “cloud8-bucket.” Then click “Create bucket.” Write down the S3 bucket name in notepad.
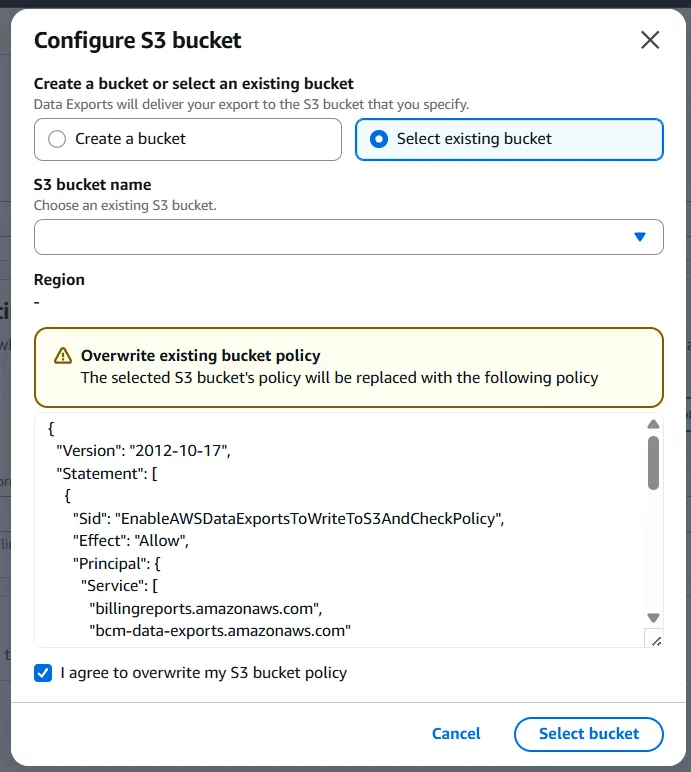
If you’ve decided to use an existing bucket, click Select existing bucket and select the desired bucket. Since policies may be incompatible with the selected bucket, you’ll need to check the “I agree to overwrite my S3 bucket policy” box. Click Select bucket. Write down the S3 bucket name in notepad.
Regardless of which configuration option you choose, fill in “S3 path prefix” with the desired prefix for your data export. We suggest using “cloud8-prefix.” Write down the S3 path prefix in Notepad.
Validate the information and click Create Report.
Edit pre-existing CUR file #
A previously configured CUR file may already exist. In this case, the user will have the option to edit the existing configuration settings. This action is not recommended if the existing CUR is being used by other applications or services, which could disrupt the configuration of systems that use it.
In the AWS Portal, search for Cost and Usage Reports in the search bar. Under Exports and Dashboards, select the desired report.
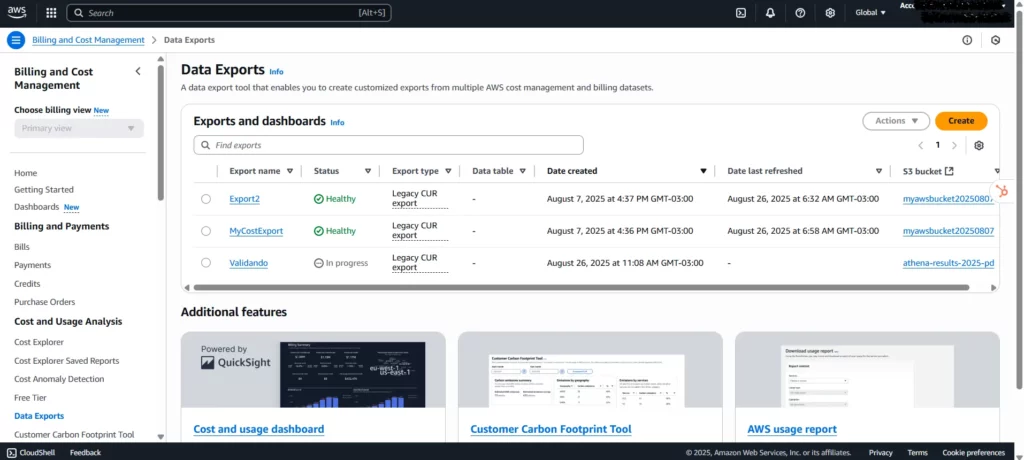
Next, click Edit.
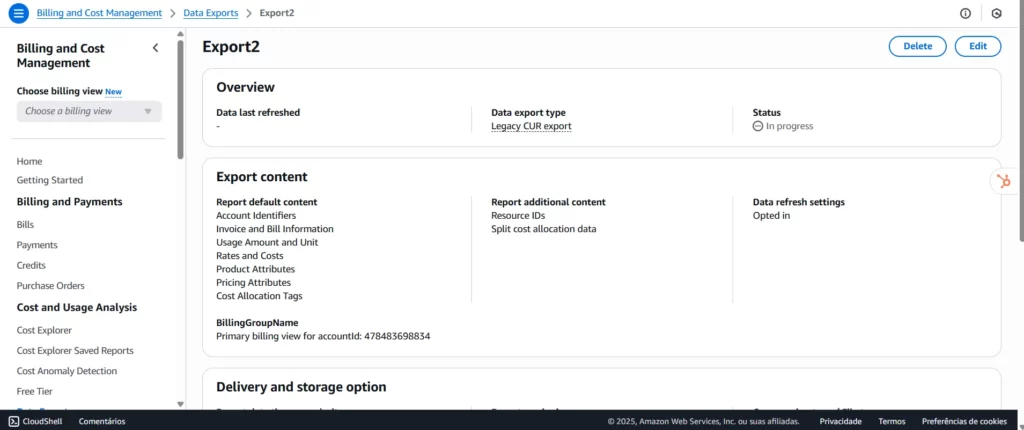
Change the necessary fields, then click Edit Report.
Note: Changes made to the CUR will not be retroactive and will take effect starting the month the change was made.
Registering the CUR on Cloud8 #
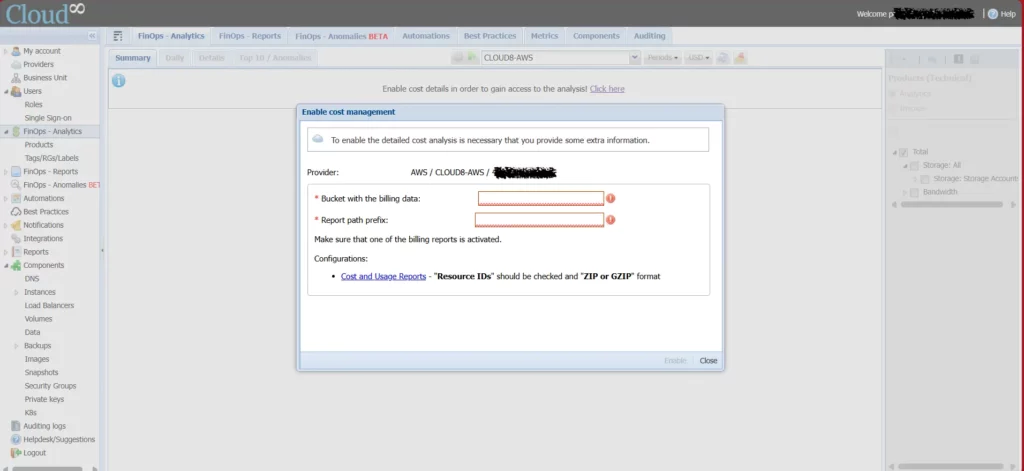
In the Cloud8 side menu, select FinOps Analytics. Select the AWS provider you previously configured from the top menu. An image will appear on the screen with the message “Enable cost details to access analysis! Click here!”.
In Enable cost management, enter:
- Bucket with billing data: Enter the Bucket name.
- Report path prefix/Export name: Enter the combination of S3 path prefix + Export name in the format <S3 path prefix>/<Export name>.
Then click “Enable.”
Note: If the CUR has just been created, you will need to wait at least 24 hours before adding it to Cloud8.
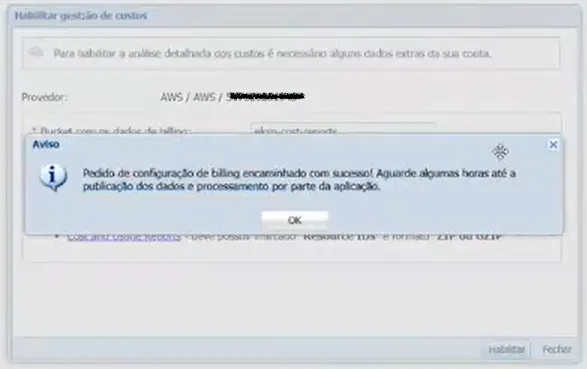
After setup, it will take a few hours for the data to be processed and published in the Cloud8 application.
Enabling Cloud8 Best Practices for AWS #
Once FinOps Analytics is configured and data is synchronized with Cloud8, you can enable the Best Practices feature in Cloud8.
Best Practices is an advanced advisor that combines over 1,000 unique security, backup, compliance, and cost reduction rules for AWS, Azure, GCP, and OCI with flexible alerts via Teams, Slack or email.
In the Cloud8 Platform side menu, select Providers, then select the desired provider and click “Best Practices”.
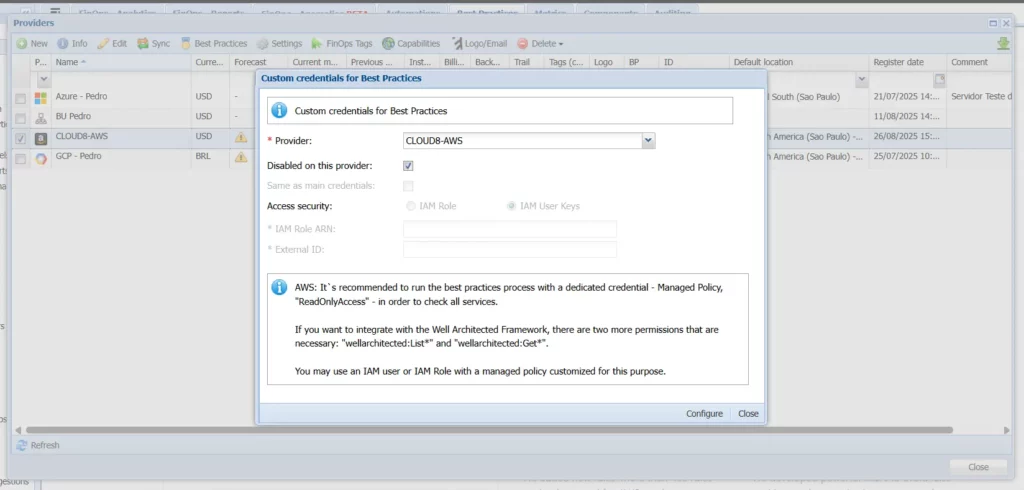
You must select the providers on which you want to enable the functionality, and to do so, uncheck the “Disabled on this provider” checkbox and select the “Same as main credentials” option.
Then click “Configure”.
Note: If FinOps Analytics has just been enabled, you will need to wait at least 24 hours before enabling the Best Practices feature.
Enabling the Cost Optimization Hub #
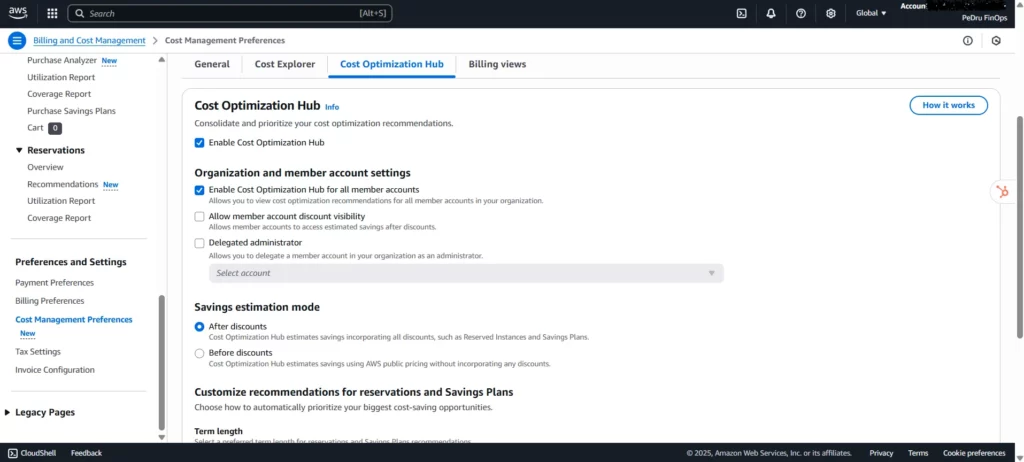
In the AWS Portal, under Billing and Cost Management / Cost Management Preferences, select the Cost Optimization Hub tab. This feature is required to enable cost optimization recommendations for various AWS services through actions such as rightsizing or the adoption of commitment-based discounts, such as Savings Plans.
Select the Enable Cost Optimization Hub option for this account and all member accounts, and then click Enable.
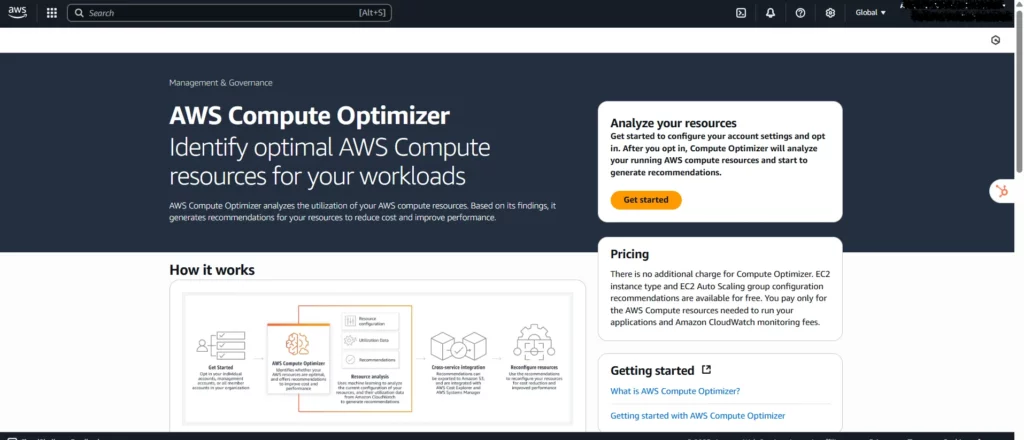
Enabling AWS Compute Optimizer #
In the AWS Portal, search for AWS Compute Optimizer in the search bar. This feature will use machine learning to analyze relevant CloudWatch metrics and resource configuration data (such as resource identifiers and metadata tags) for specific services to make recommendations. Click “Get started”.
You can activate the Cost Optimization Hub directly through the organization (management account) and enable it for all member accounts at once, or choose to activate it on an account-by-account basis.
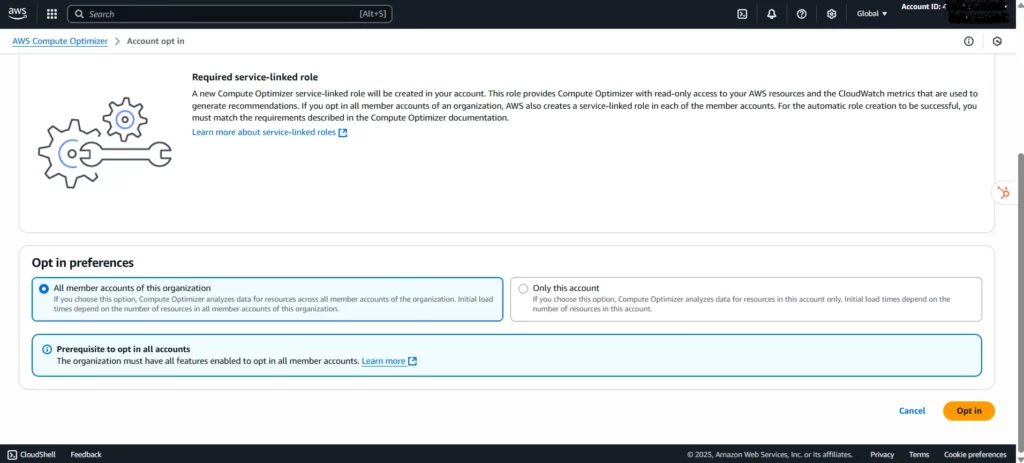
Under Opt-in preferences, select All member accounts in this organization, and then click Opt in.
Adding admin credentials on AWS for Cloud8 #
Cloud8 supports using IAM for AWS with a custom security credential. This allows you to ensure least privilege when integrating Cloud8 with your AWS account. These credentials typically include:
- Access Key
- Minimum Permissions Required
- MFA Login Support
- Audit Logging
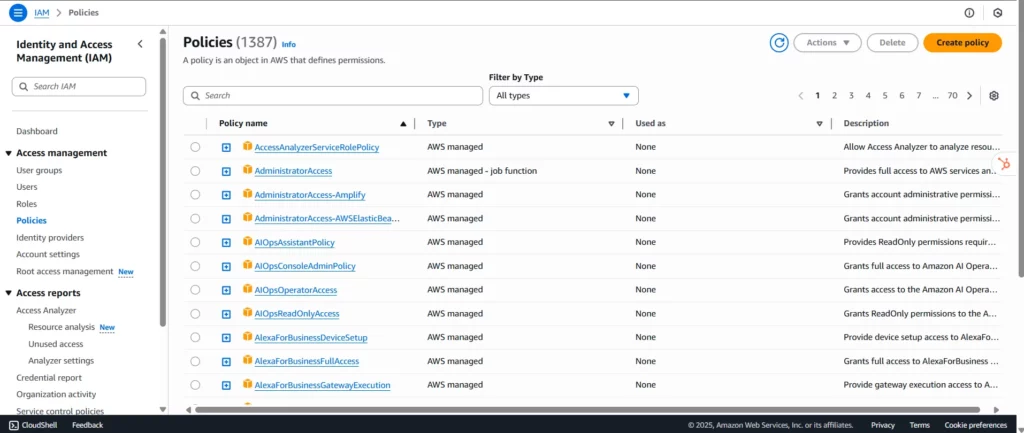
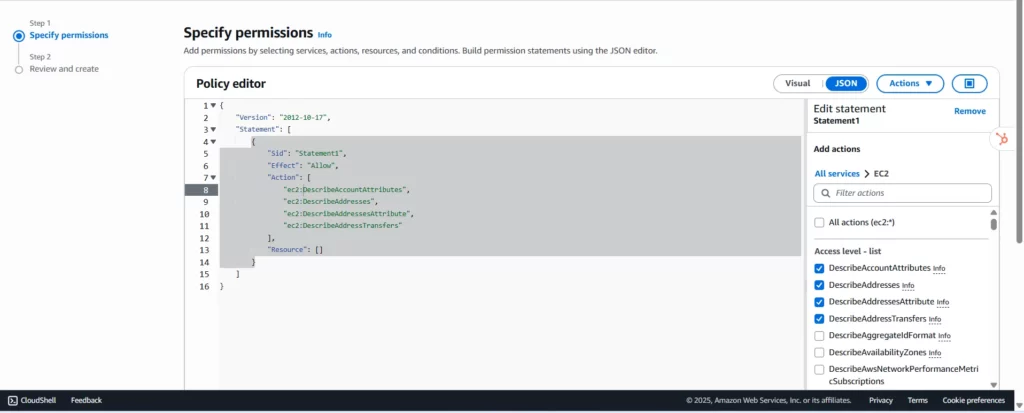
In IAM, go to Policies. Then click “Create policy.” In the JSON tab, you can select which operations will be authorized, based on the Resource Type. You can also select which resources will be impacted.
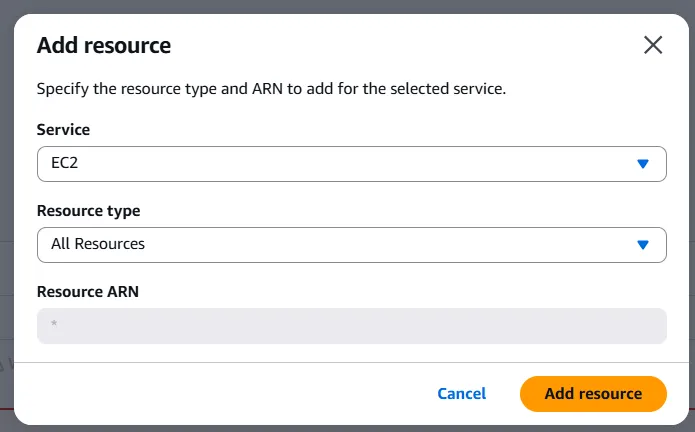
When you select an action, the tool automatically modifies the JSON to include the selected permissions. Under “Add resource,” select “All resources” for Resource Type. Once you’ve configured all the JSON, click “Next”.
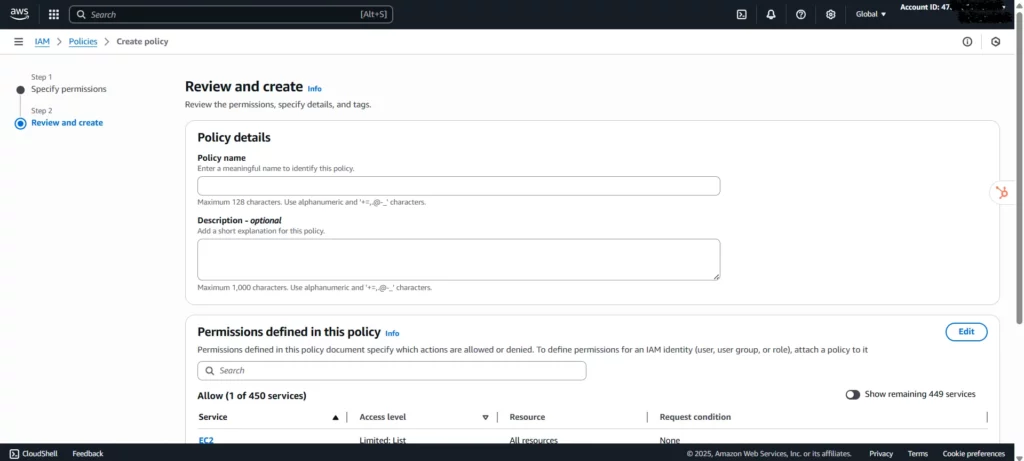
In the “Review & Create” tab, add a “Policy Name” to identify the policy you created and assign it later. Then click “Create policy”.
Below are some permissioning models adopted at Cloud8:
{
  "Version": "2012-10-17",
  "Statement": [
  {
    "Effect": "Allow",
    "Action": [
       "ec2:Describe*",
       "ec2:CreateImage",
       "ec2:CreateSnapshot",
       "ec2:ModifyInstanceAttribute",
       "ec2:AssociateAddress",
       "ec2:RebootInstances",
       "ec2:StartInstances",
       "ec2:StopInstances",
       "ec2:CreateTags",
       "ec2:DeleteTags",
       "rds:Describe*",
       "rds:StartDBInstance",
       "rds:StopDBInstance",
       "rds:StartDBCluster",
       "rds:StopDBCluster",
       "rds:Download*",
       "rds:ListTagsForResource",
       "rds:ModifyDBInstance*",
       "rds:CreateDBSnapshot*",
       "ssm:Describe*",
       "savingsplans:Describe*",
       "elasticache:Describe*",
       "elasticloadbalancing:Describe*",
       "elasticbeanstalk:Describe*",
       "autoscaling:Describe*",
       "ecs:Describe*",
       "ecs:List*",
       "eks:Describe*",
       "eks:List*",
       "cloudtrail:DescribeTrails",
       "cloudtrail:GetTrailStatus",
       "cloudtrail:Look*",
       "cloudfront:Describe*",
       "cloudfront:Get*",
       "cloudfront:List*",
       "storagegateway:Describe*",
       "storagegateway:List*",
       "es:Describe*",
       "es:List*",
       "elasticache:Describe*",
       "elasticache:List*",
       "redshift:Describe*",
       "workspaces:Describe*",
       "lightsail:Get*",
       "lambda:Get*",
       "lambda:List*",
       "tag:get*",
       "trustedadvisor:Describe*",
       "support:Describe*",
       "iam:Get*",
       "iam:List*",
       "iam:Generate*",
       "organizations:Describe*",
       "organizations:List*",
       "route53:Get*",
       "route53:List*",
       "cloudwatch:Get*",
       "cloudwatch:List*",
       "kms:List*",
       "kms:Describe*",
       "sns:ListSubscriptions*",
       "sns:CreateTopic",
       "sns:Subscribe",
       "sns:ConfirmSubscription",
       "rds:CreateEventSubscription"
    ],
       "Resource": "*"
  },
  {
    "Action": [
       "s3:ListAllMyBuckets"
    ],
    "Effect": "Allow",
    "Resource": "arn:aws:s3:::*"
  },
  {
    "Action": [
       "s3:ListBucket",
       "s3:GetBucketLocation"
    ],
    "Effect": "Allow",
    "Resource": "arn:aws:s3:::___bucket_name___"
  },
  {
    "Action": [
       "s3:GetObject"
    ],
    "Effect": "Allow",
    "Resource": "arn:aws:s3:::___bucket_name___/*"
  }
  ]
}
Restrict Start/Stop to a specific set of resources grouped by tags:
{
   "Effect": "Allow",
   "Action": [
       "ec2:RebootInstances",
       "ec2:StartInstances",
       "ec2:StopInstances"
   ],
   "Resource": "arn:aws:ec2:*:*:instance/*",
   "Condition": {
       "StringEquals": {
             "ec2:ResourceTag/Cloud8": "Enable"
       }
   }
},
Backup Cleanup/Retention Policy that deletes AMI/Snapshots according to rules (insert in the first block with general permissions):
…
ec2:DeregisterImage
ec2:DeleteSnapshot
rds:DeleteDBSnapshot
rds:DeleteDBClusterSnapshot
lightsail:DeleteInstanceSnapshot
…
Copy to another region:
…
ec2:CopyImage
rds:CopyDBSnapshot
rds:CopyDBClusterSnapshot
…
RDS Savings and Backup:
…
rds:ModifyDBInstance*
rds:CreateDBSnapshot*
rds:CreateDBClusterSnapshot*
…
RDS Monitoring and Events:
…
sns:Describe*
sns:ListSubscriptions*
sns:CreateTopic
sns:Subscribe
sns:ConfirmSubscription
rds:CreateEventSubscription
…
Executing scripts via EC2 Command:
…
ssm:List*
ssm:Get*
ssm:SendCommand
…
Backup (vault) to another source account:
…
ec2:ModifyImageAttribute
ec2:ModifySnapshotAttribute
rds:ModifyDBSnapshotAttribute
rds:ModifyDBClusterSnapshotAttribute
…
Destination account:
…
ec2:CopyImage
ec2:CopySnapshot
rds:CopyDBSnapshot
rds:CopyDBClusterSnapshot
…
Cost reduction in Auto Scaling and Beanstalk:
…
elasticbeanstalk:Update*
autoscaling:Update*
…
Cost reduction in ECS and Fargate:
…
ecs:Describe*
ecs:Update*
…
Cost reduction in OpenSearch/ElasticSearch:
…
ess:Update*
…
Load Balancer:
…
elasticloadbalancing:RegisterInstancesWithLoadBalancer
elasticloadbalancing:DeregisterInstancesFromLoadBalancer
elasticloadbalancing:RegisterTargets
elasticloadbalancing:DeregisterTargets
…
Tag Editing:
…
tag:*
ec2:CreateTags
ec2:DeleteTags
rds:AddTagsToResource
rds:RemoveTagsFromResource
elasticloadbalancing:RemoveTags
elasticloadbalancing:AddTags
route53:ChangeTags*
dynamodb:Tag*
dynamodb:Untag*
logs:Tag*
logs:Untag*
eks:Tag*
eks:Untag*
elasticache:RemoveTagsFromResource
elasticache:AddTagsToResource
s3:DeleteObjectTagging
s3:DeleteJobTagging
s3:PutBucketTagging
s3:DeleteStorageLensConfigurationTagging
s3:ReplicateTags
s3:PutStorageLensConfigurationTagging
s3:PutObjectVersionTagging
s3:PutObjectTagging
s3:PutJobTagging
s3:DeleteObjectVersionTagging
dms:RemoveTagsFromResource
dms:AddTagsToResource
…
Changing disk type:
…
ec2:ModifyVolume*
…
Cost reduction with Redshift:
…
redshift:Pause*
redshift:Resume*
…
Cost reduction with Workspaces:
…
workspaces:Stop*
workspaces:Start*
…
Support to Lightsail:
…
lightsail:Describe*
lightsail:Get*
lightsail:Stop*
lightsail:Start*
lightsail:Reboot*
lightsail:Create*
lightsail:Copy*
…
Now just assign the created policy to the Role configured for Cloud8 access.
Block access to the contents of all S3 buckets, with explicit exceptions.
{
“Version”: “2012-10-17”,
“Statement”: [
{
“Sid”: “DenyReadingObjectsFromOtherBuckets”,
“Effect”: “Deny”,
“Action”: [
“s3:GetObject”,
“s3:GetObjectVersion”
],
“NotResource”: [
“arn:aws:s3:::<bucket-name>/*”
]
},
{
“Sid”: “DenyListingOtherBucketsContent”,
“Effect”: “Deny”,
“Action”: [
“s3:ListBucket”
],
“NotResource”: [
“arn:aws:s3:::<bucket-name>”
]
}
]
}
Note: With this type of configuration, the bucket rules in Best Practices will not work.


