
Cloud8 is a platform that centralizes and enriches data from multiple accounts and multiple cloud providers, making it easier to analyze and visualize data both separately and in a unified way. To help our customers integrate this data into their own BI systems, custom reports, or dashboards, we offer the ability to export data to storage accounts of the main cloud providers.
Below you will find the necessary steps to create this integration with Amazon AWS, Google GCP, and Microsoft Azure. Jump directly to:
 Cloud8 Integration with AWS S3 Bucket |  Cloud8 Integration with Azure Storage Account |  Cloud8 Integration with GCP Cloud Storage |
Exporting data from Cloud8 to a Cloud Storage Account (all supported providers)
How to integrate with an AWS S3 Bucket? #
Below is the step-by-step guide to integrating an S3 Bucket with your Cloud8 account.
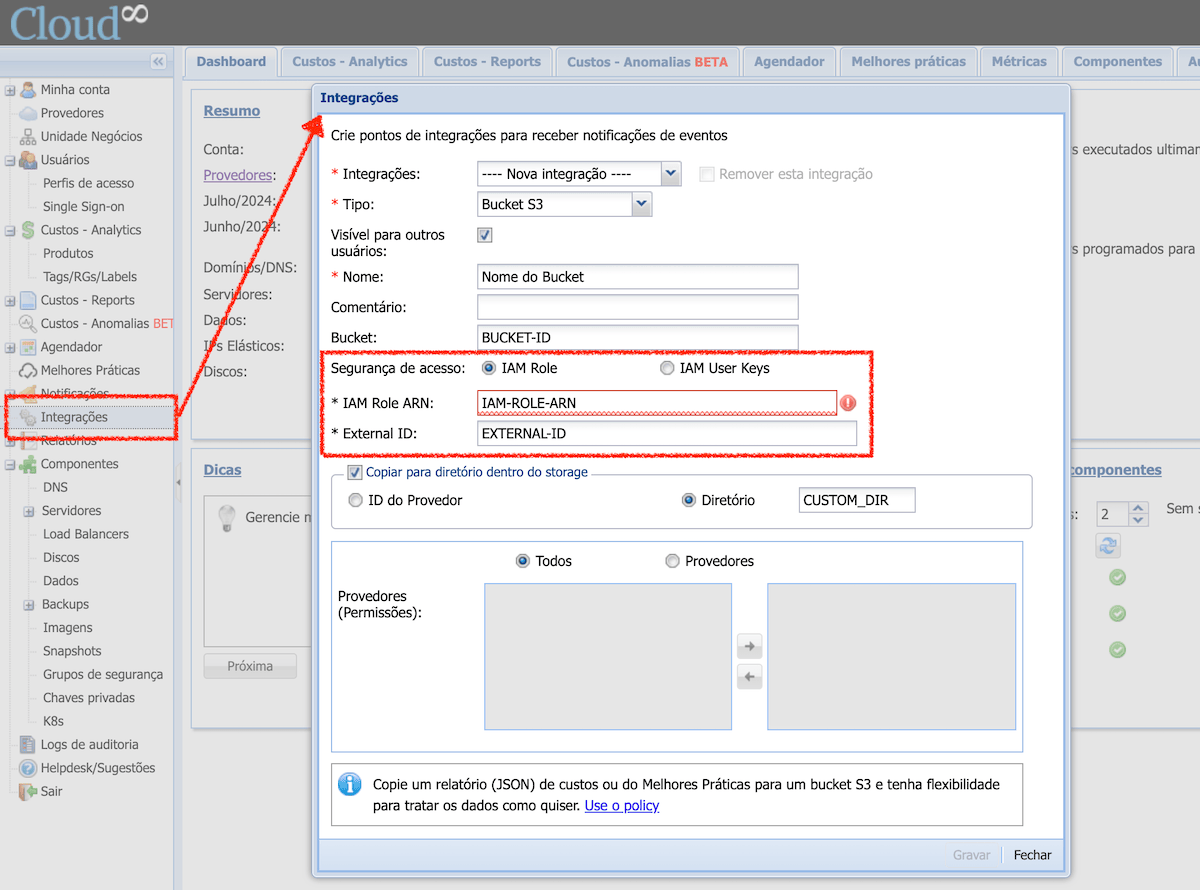
- Find the “Integrations” option in the side menu;
- Create a new integration of Type “S3 Bucket”;
- Specify the name of the S3 Bucket defined in AWS in the “Bucket” field;
- Configure the access pair, IAM Role ARN, and External ID provided by AWS. This credential must have permissions to create and update files in your Bucket;
- Fill in the remaining information and finalize by clicking Save
- This integration also works in Best Practices and in “Reports” – you can create the report to be exported
IAM Role #
An IAM Role is an entity in AWS IAM that defines a set of permissions for making requests to AWS services. Unlike an IAM user, which is associated with a specific person, an IAM role is intended to be assumed by any trusted entity, such as an AWS service, an application, or an IAM user. Roles are useful for granting temporary permissions and can be assumed by different entities as needed.
ARN (Amazon Resource Name) #
The ARN is an identifier that follows a standard, unique format to identify resources within AWS. It is used to specify the role uniquely in policies and permissions.
Example of Role ARN #
arn:aws:iam::ID-NUMERICO-AWS:role/NOME-DO-ROLEUsing IAM Role ARN in S3 #
When you use an IAM Role with S3, you can grant specific permissions to access S3 buckets and objects. For example, you can create an IAM role with permissions to access a specific S3 bucket and then configure an AWS service (such as EC2) or an IAM user to assume that role. This is useful for managing and controlling access to S3 resources securely and scalably.
Why use an IAM Role ARN? #
- Security: Allows granting temporary permissions, minimizing risks.
- Flexibility: Can be assumed by multiple entities, making permissions management easier.
- Scalability: Ideal for large environments where different services and users need controlled access.
How to integrate with an Azure Storage Account? #
If you haven’t already, the first step is to create a Storage Account in Azure. To do this, in the search bar of the Azure portal, search for “Storage accounts”. Click “Create”. In the Basics tab, fill in the information, and define the Subscription and Resource Group where the storage account will be created.
Define a name and region for creating the resource, and under “Preferred storage type” choose “Azure Blob Storage or Azure Data Lake Storage Gen 2”.
Under Performance, select “Standard”, and under Redundancy select “Locally-redundant storage (LRS)”. However, this is just a suggestion, and the redundancy definition should always follow the user’s business rules.
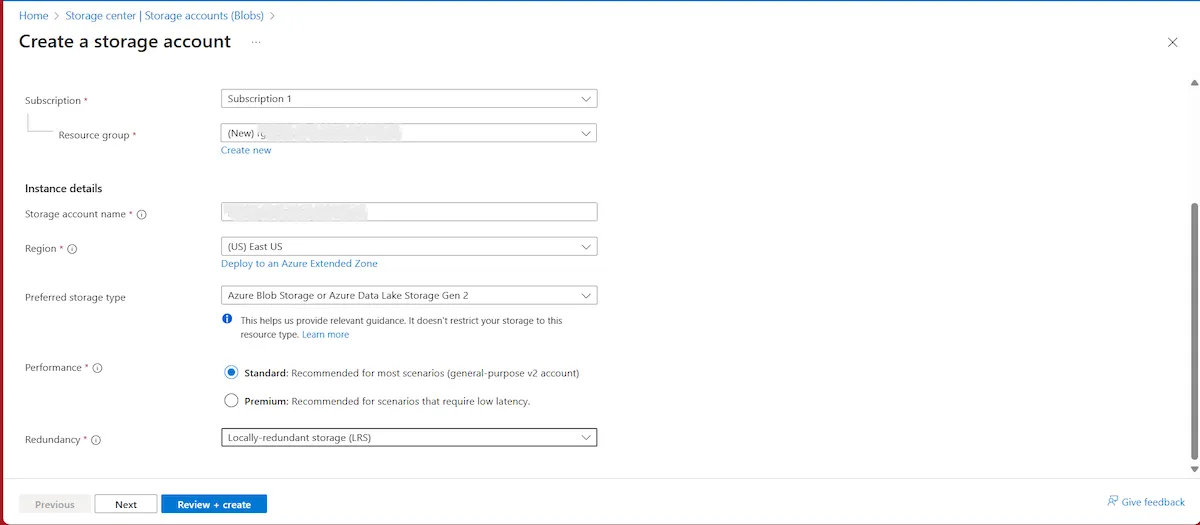
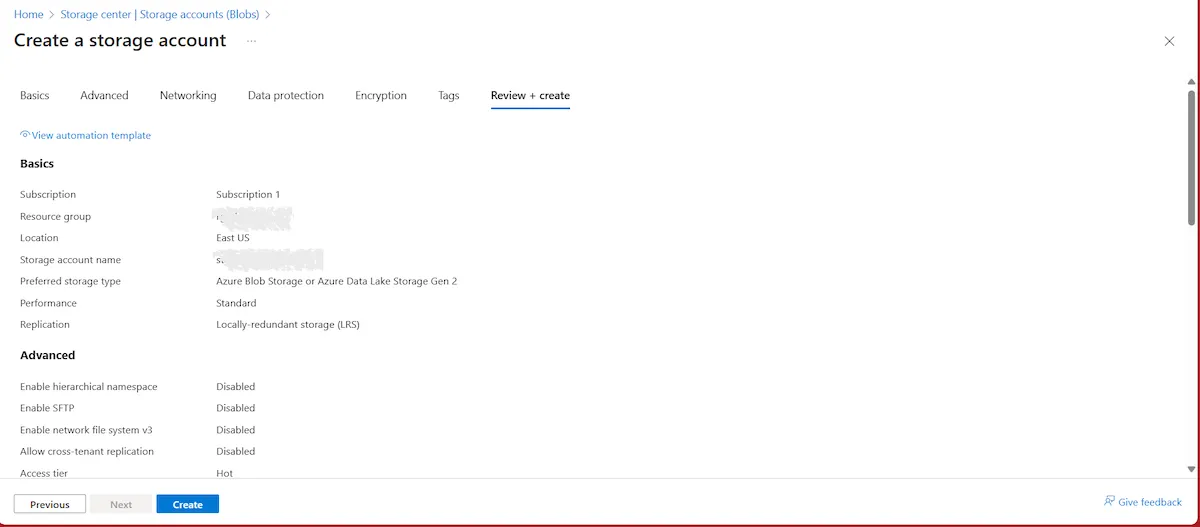
Finish by clicking “Review + create”. Validate the data and click “Create”.
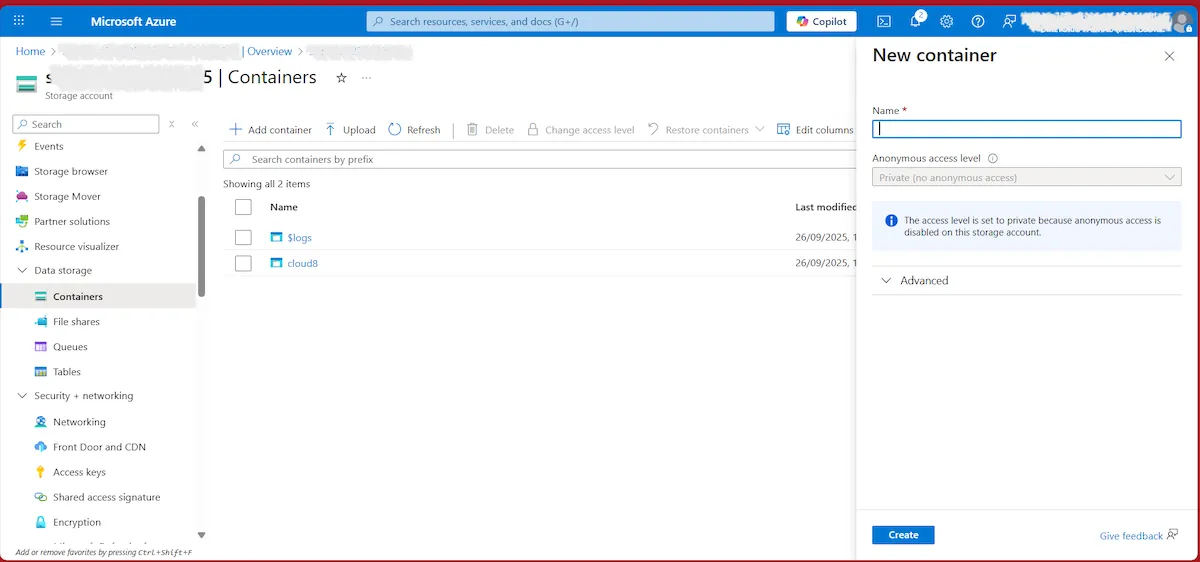
Search for the created storage account. In the left side menu, look for “Containers”. Click “Add container”, define a name, and click “Create”. Note down the name of the created container.
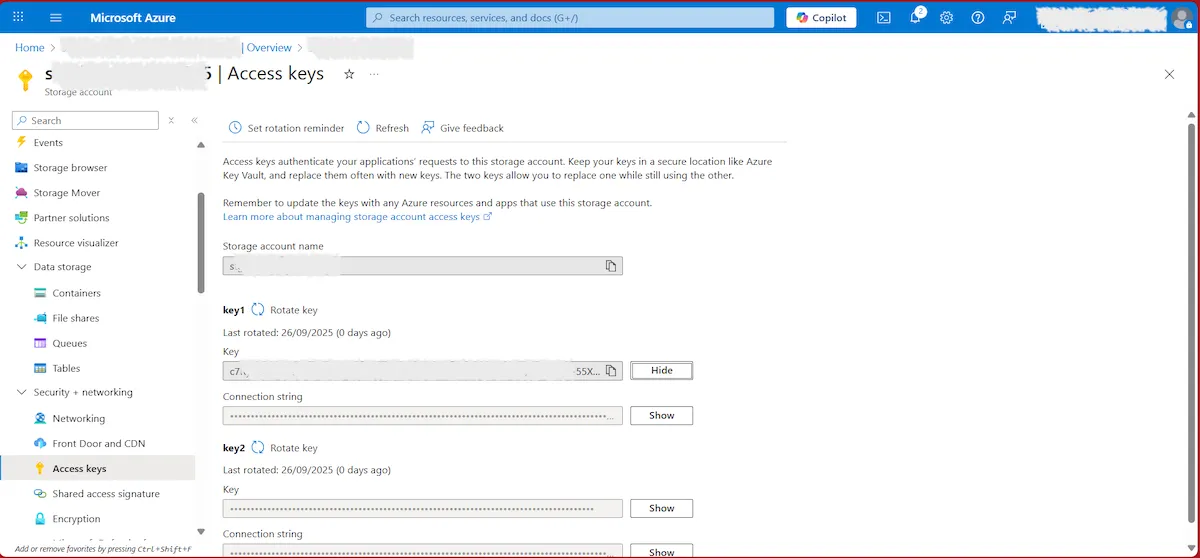
In the left side menu, locate “Access keys”. Copy the following information to a notepad:
- Storage account name
- Key
Integrating the Storage Account with the Cloud8 Platform #
Follow the steps below to create an integration with the Azure Storage Account within our MultiCloud Dashboard.
- Find the “Integrations” option in the side menu
- Select “New Integration” from the first option
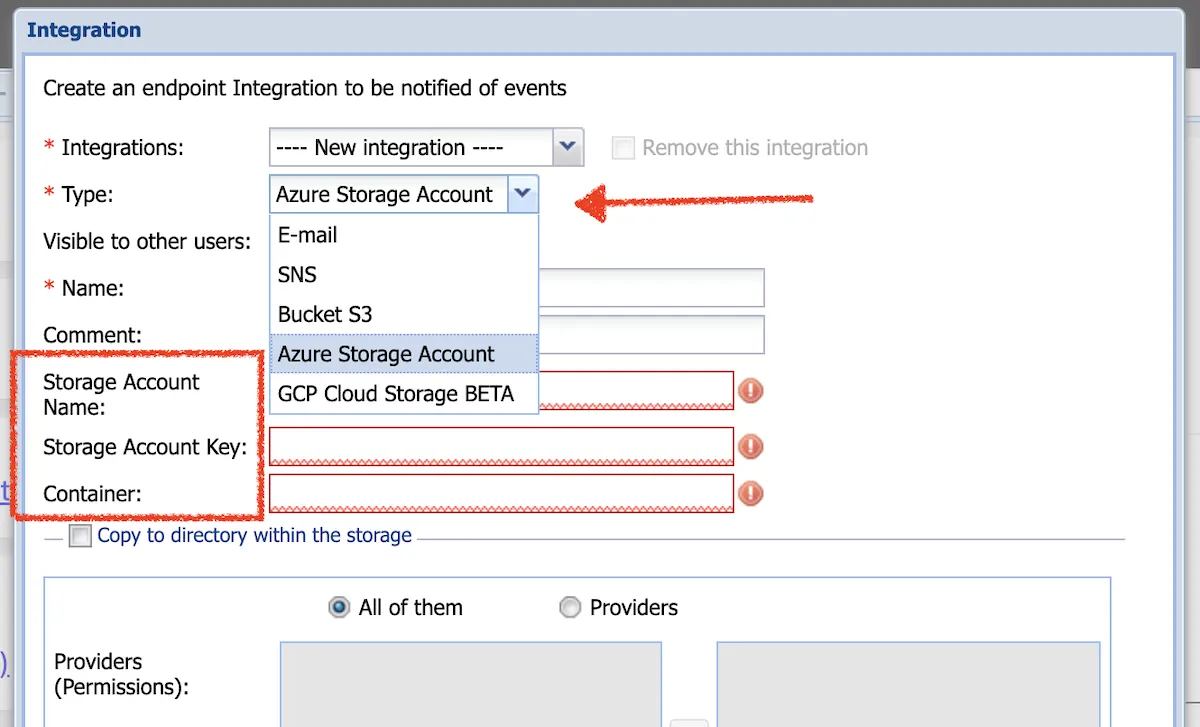
- Click on “Type” and select the “Azure Storage Account” option
- Give this integration a name
- Fill in the required data: Storage Account Name, Storage Account Key, and Container
How to integrate with GCP Cloud Storage? #
If you haven’t already, you first need to create the GCP JSON in the Service Account. To do this, access the GCP Console and search for IAM & Admin. Select Service Accounts in the left side menu.
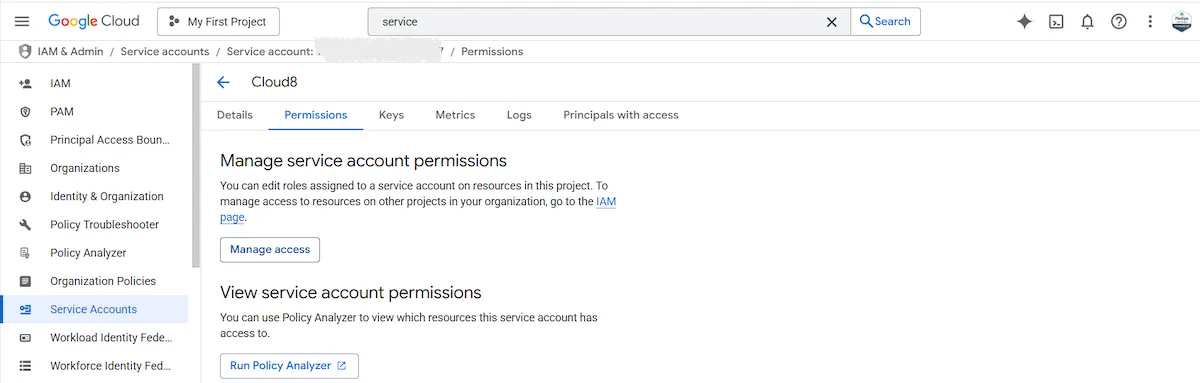
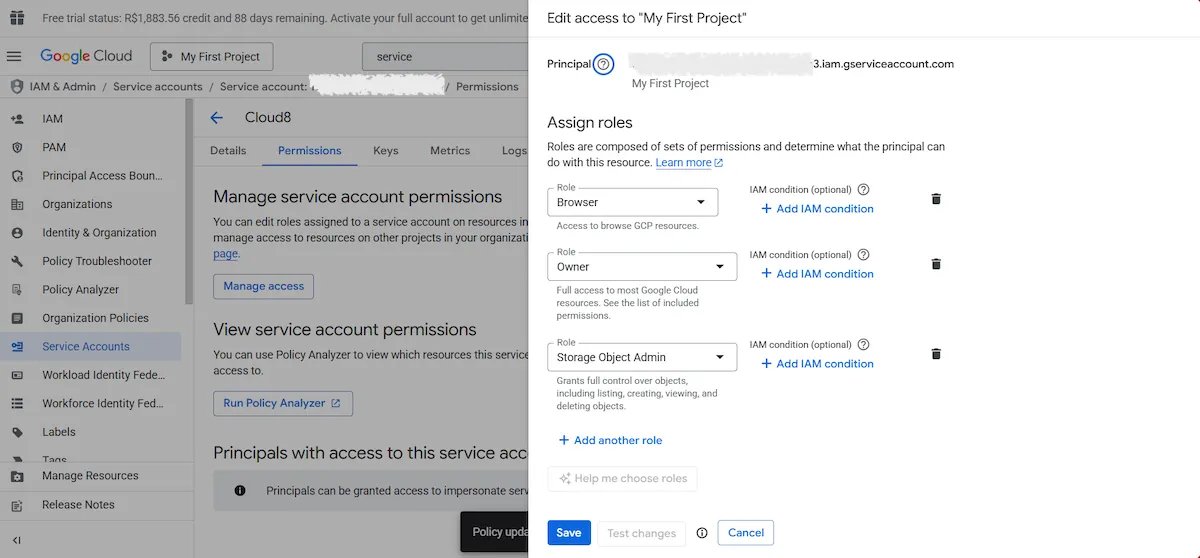
In the Permissions tab, select Manage access | Add another role and choose Storage Object Admin.
Return to Service Accounts, click on the three-dot icon, and select the Manage Keys option. Click Add key | Create new key to create a new access key if you haven’t created one yet. Otherwise, granting the necessary accesses in the previous step is sufficient.
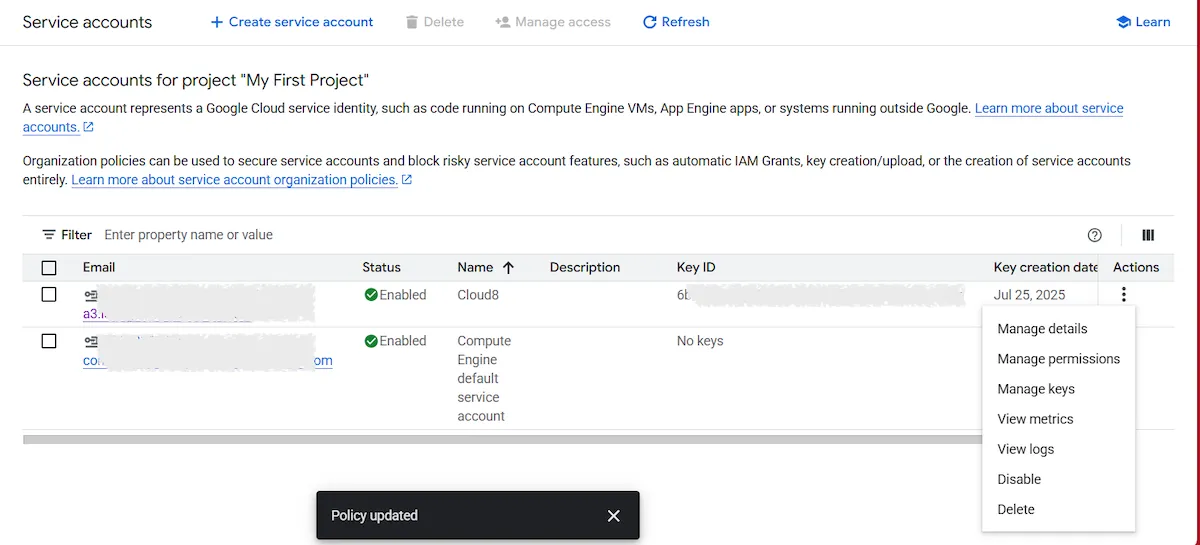
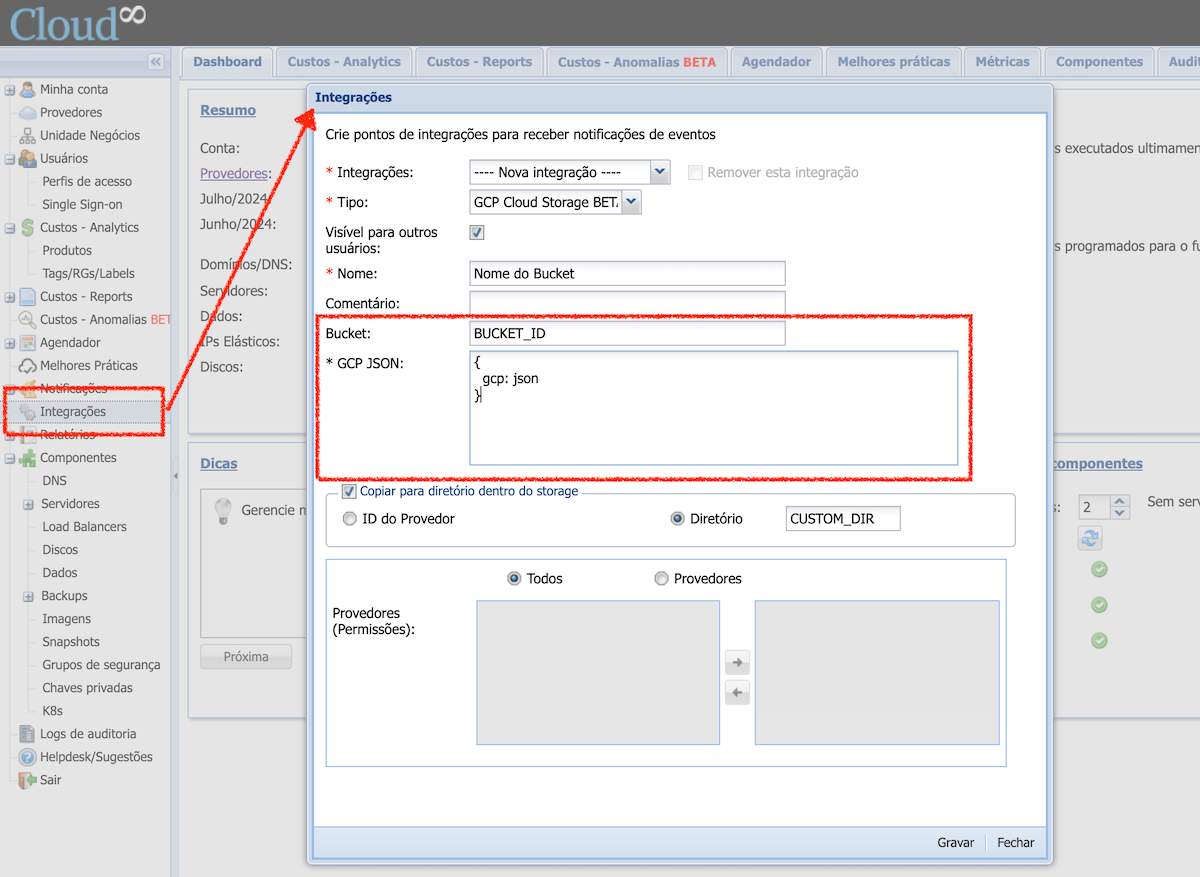
See below how to integrate GCP Cloud Storage with your Cloud8 account.
- Find the “Integrations” option in the side menu;
- Create a new integration of Type “GCP Cloud Storage”
- Add a credential (JSON file of a Service Account) generated in Access Key;
- Click “Save” and you’re all set.
How to export data from Cloud8 to Cloud Storage #
Cloud8 customers often have reports in different formats that need to be fed with the data available in our reports. The simplest way to do this is through an integration with Cloud Storage. See below how to perform this extraction in a few quick steps.
NOTE: An AWS S3 bucket was used in the example, but the process is the same for all supported providers.
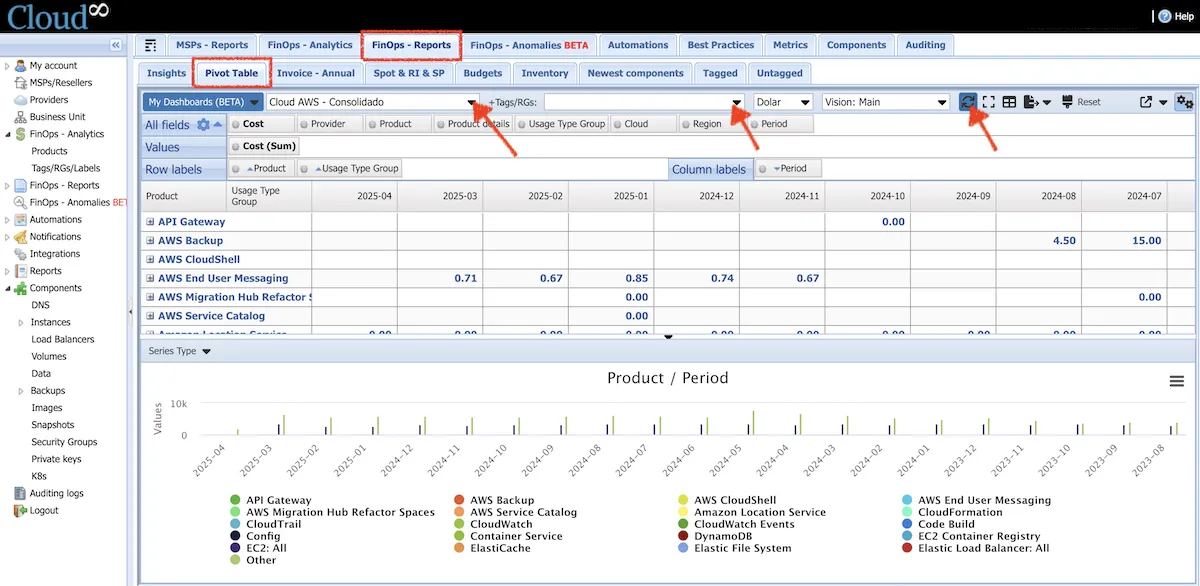
- Click on “FinOps – Reports“, then on “Pivot Table”
- Select the “Provider“, “Tags“, currency, and markup
- Click “Refresh” to load the report with the selected filters
- Use the “My Dashboards” button and select “Save New”
- Among the options displayed, select the integration created in the previous step for the chosen provider
- Don’t forget to save
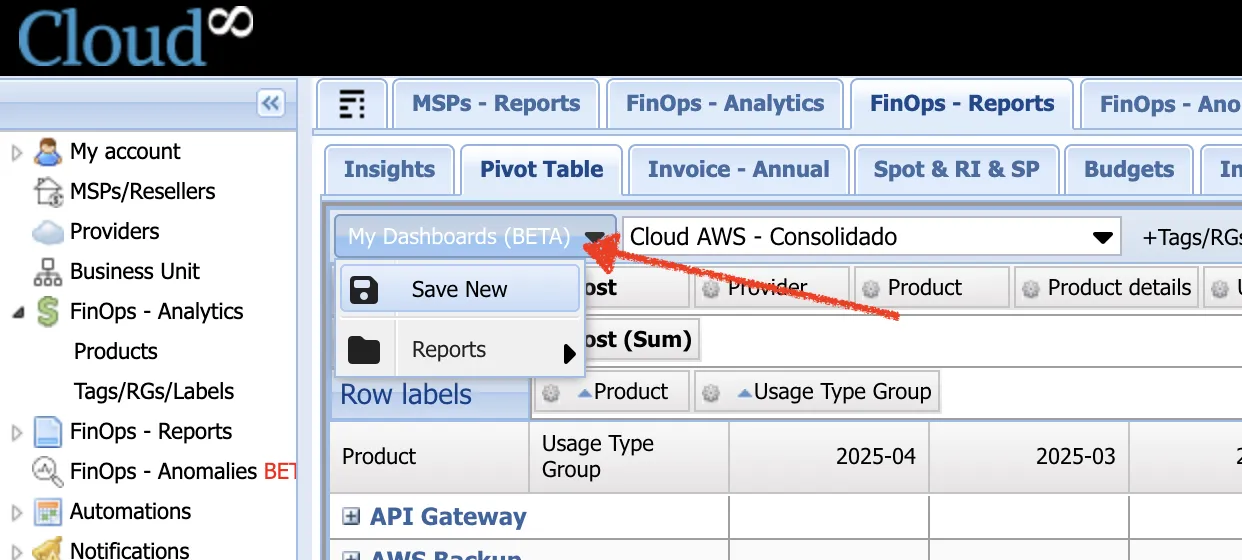
After these two simple steps, the customer will receive a complete and consistent CSV file, with the markup defined by them, 2 to 3 times a day containing all data.
This way, no API integration, credential generation, scripts, error handling, etc., are required.
Best Practices #
Under “Reports” you can export all data in JSON format. If you choose “Immediately“, we will export whenever a new item enters or leaves the rule. Inside the JSON, there is an “identifier” that can be used to reconcile an item that opened and was later closed (whether because the rule changed or the customer/partner fixed it, and thus it can be used to close automatically).
Inventory #
To export Inventory data, contact Support so we can configure it internally.


