
Introduction #
In an Azure Account, you will need to configure the integration with Cloud8 for each Subscription ID that is part of the Tenant ID (Directory) and also at the EA Enterprise Administrator level, when applicable.
To connect an Azure account with an Enterprise Agreement (EA) contract to Cloud8, it is necessary to:
- Create a Service Principal (App Registration)
- Assign the Reader role to each Subscription
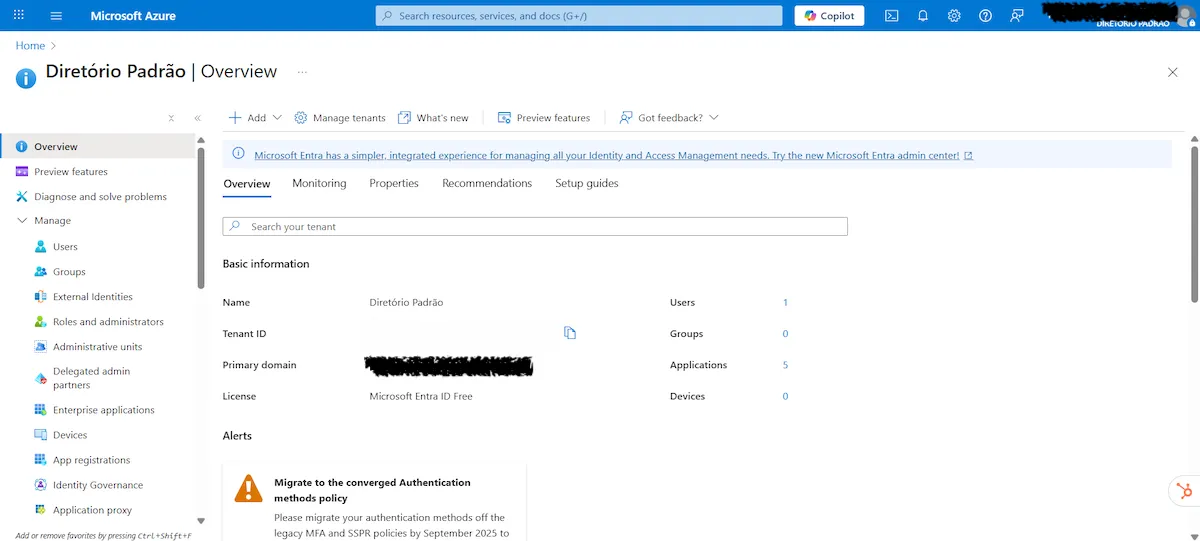
To begin, search for Microsoft Entra ID and access the Overview tab. Make a note of the Tenant ID.
We suggest keeping a notepad open to record the following information:
- SUBSCRIPTION ID (Step 1)
- SECRET VALUE (Step 2)
- APPLICATION ID (Step 2)
- TENANT ID (Step 2)
Prerequisites #
- Change the language to English in the top menu by clicking the Settings icon. Then, select Language + Region and choose English under Language.
- The user must be a Global Administrator in the Tenant where the configuration will be performed.
How to verify if the user has the Global Administrator role #
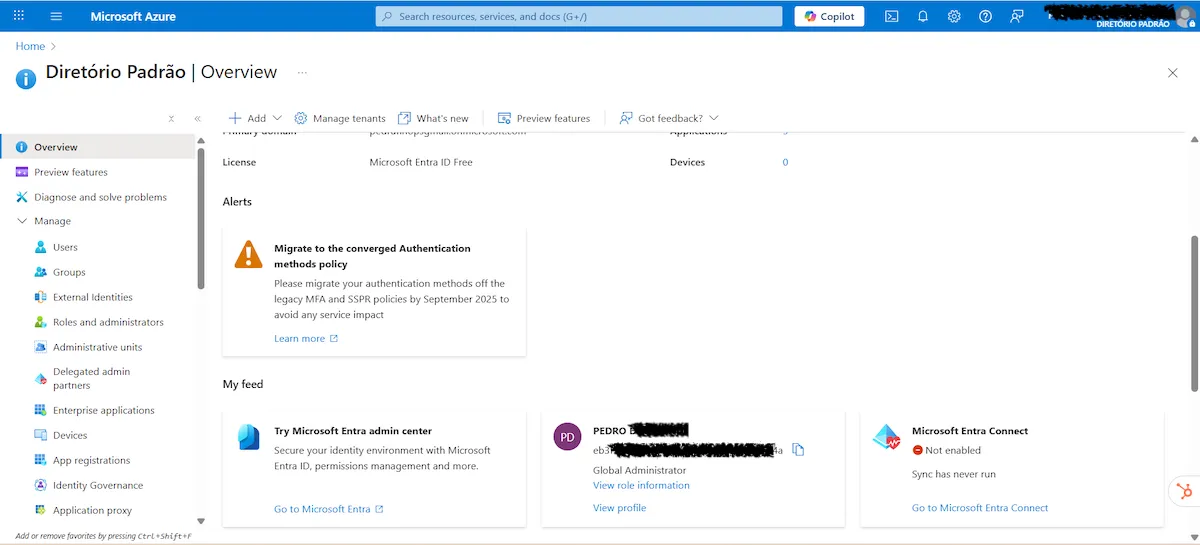
In the top search bar, search for “Microsoft Entra ID”. Under Overview, verify if the user has the Global Administrator role in the My Feed section.
To configure Global Administrator access, another user with Global Administrator access needs to grant the role using Microsoft Entra ID. By clicking on Users, you will be directed to the account user list.
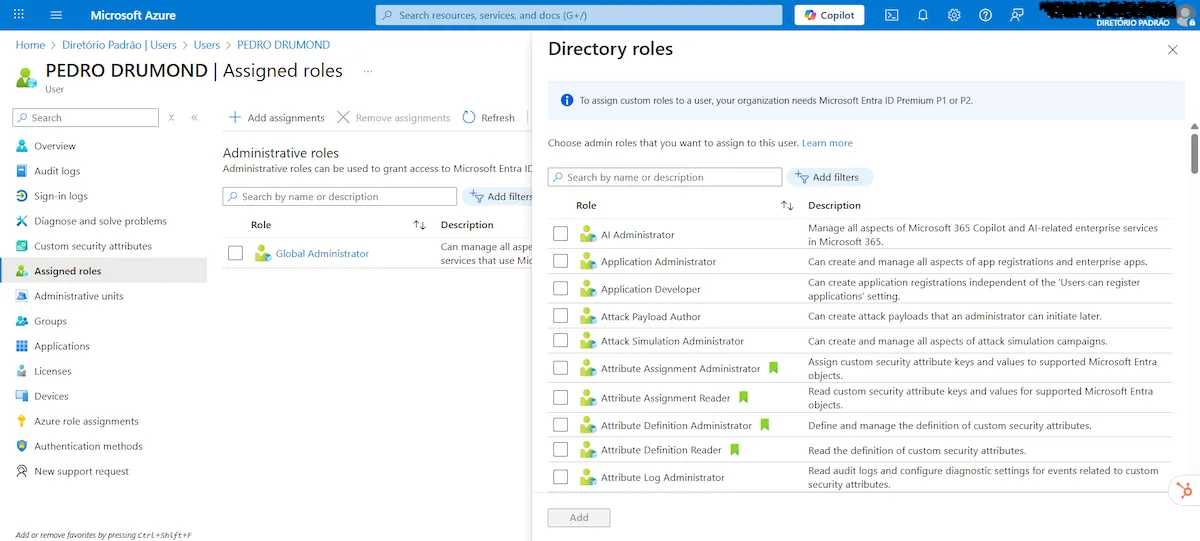
Select the user who will receive the new role and click Assigned roles. Then, click Add assignments, search for Global Administrator, and finish by clicking Add.
Step 1 – Selecting the Subscription #
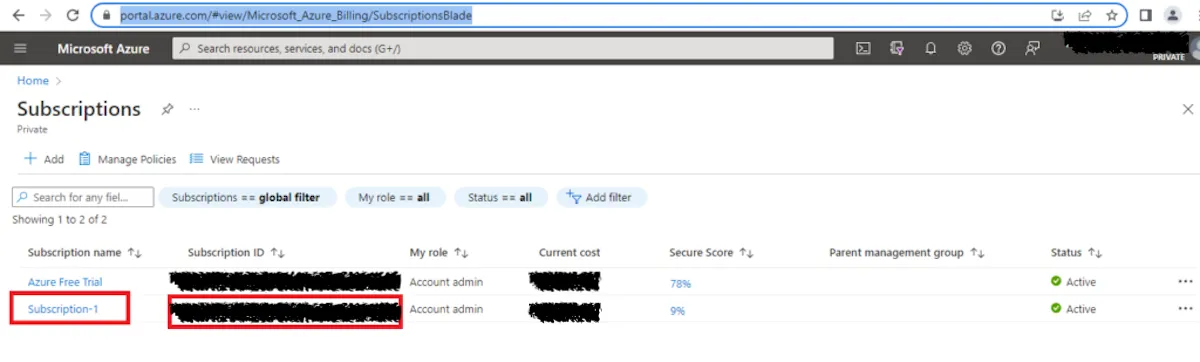
In the top search bar, search for “Subscription”. Select the Subscription and make a note of the Subscription ID.
Step 2 – Configuring App Registration #
In the top search bar, search for App Registrations. Click on App Registration.
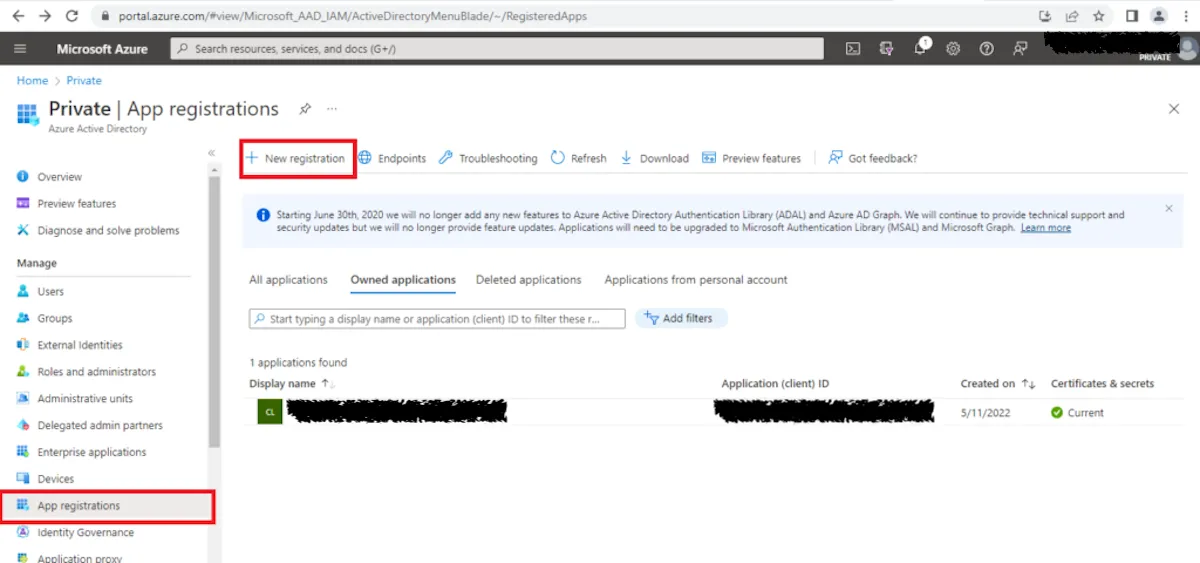
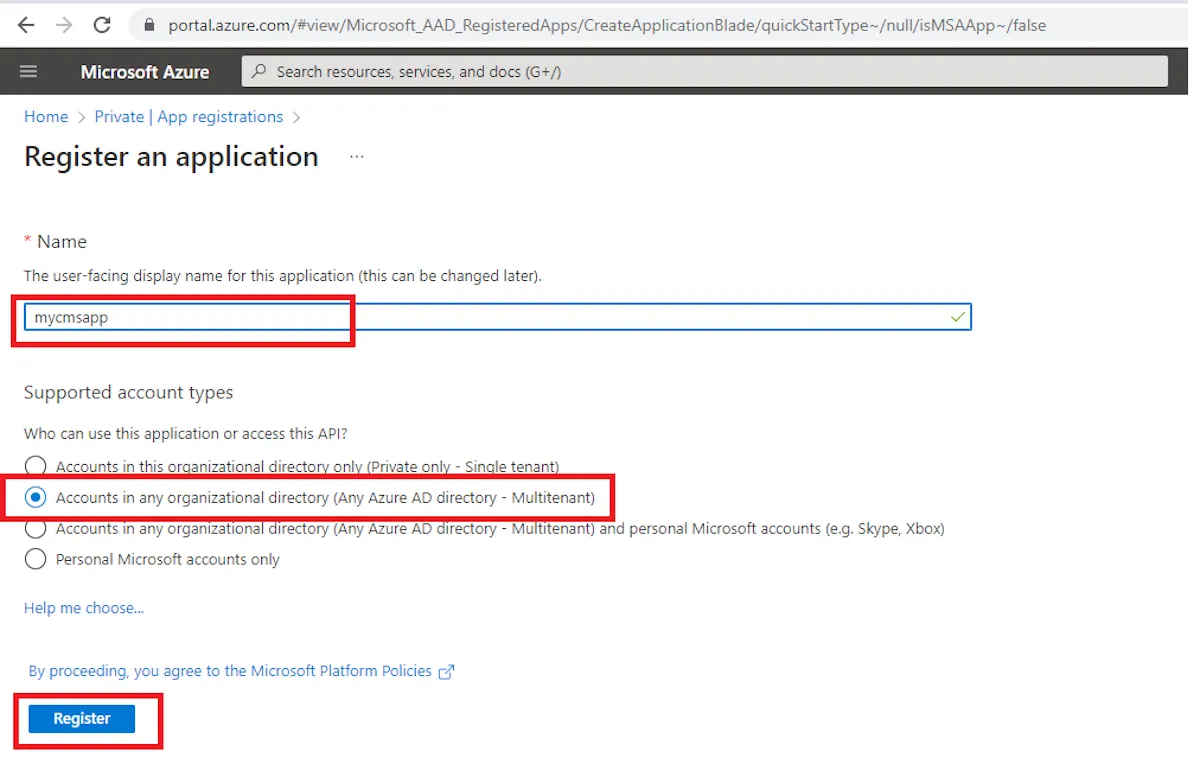
Click “New registration” and provide a name.
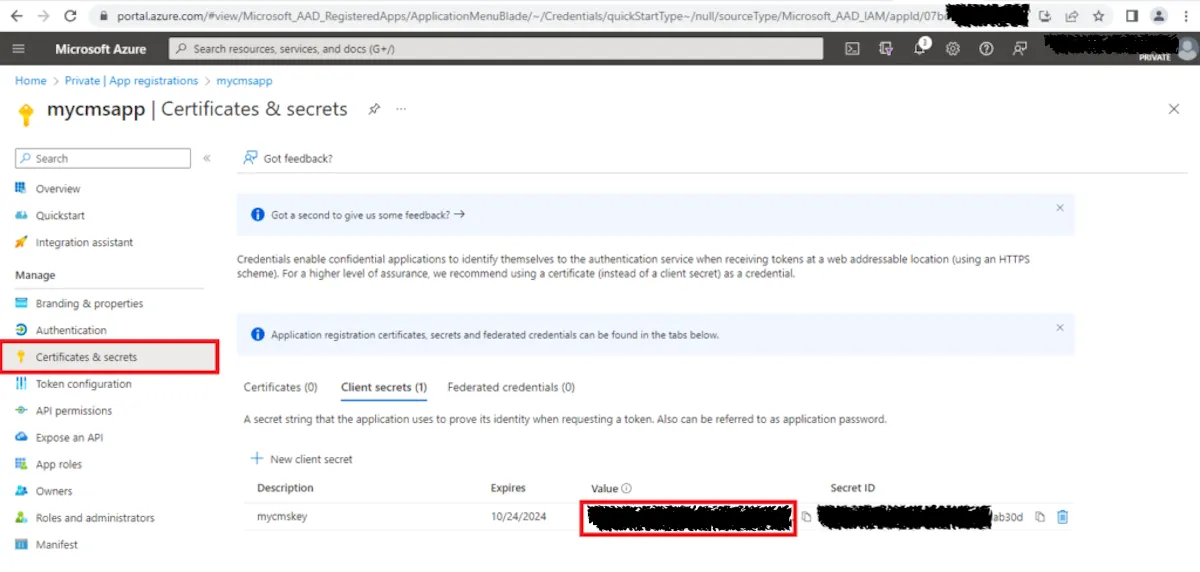
Select the created App Registration and click Certificates & Secrets in the left sidebar menu. Then, click New Client Secret. Choose a name for the key and set the expiration date to 24 months.
After creation, the provider will be configured using the Secret Value. Make a note of it immediately after creation, as it will no longer be visible.
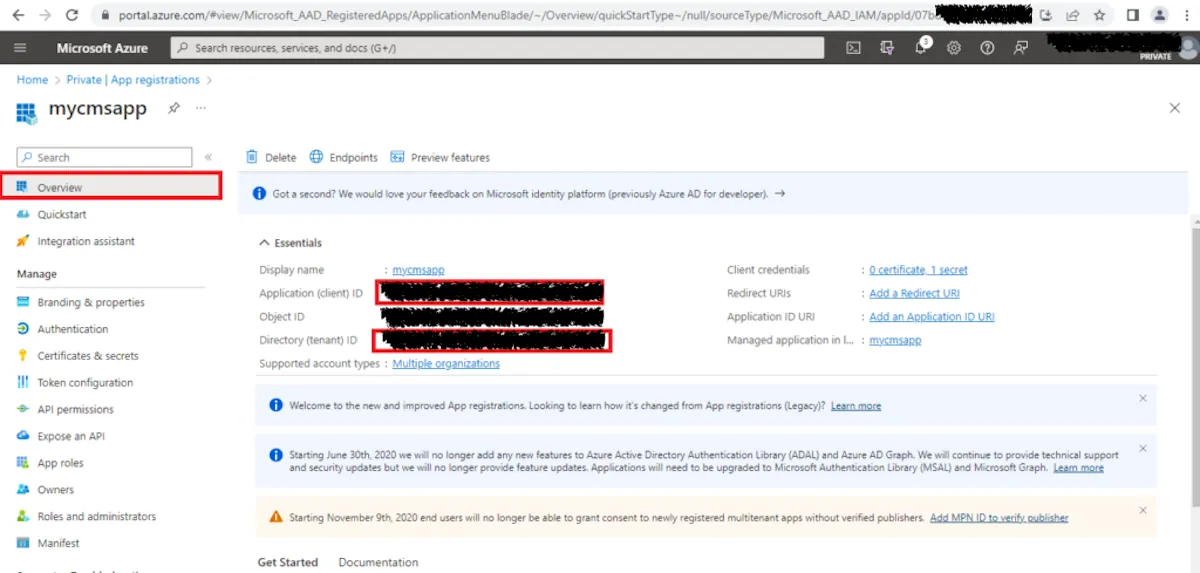
Still within App Registration, make a note of the Application ID and the Tenant ID.
Step 3 – Grant the necessary permissions to the App Registration #
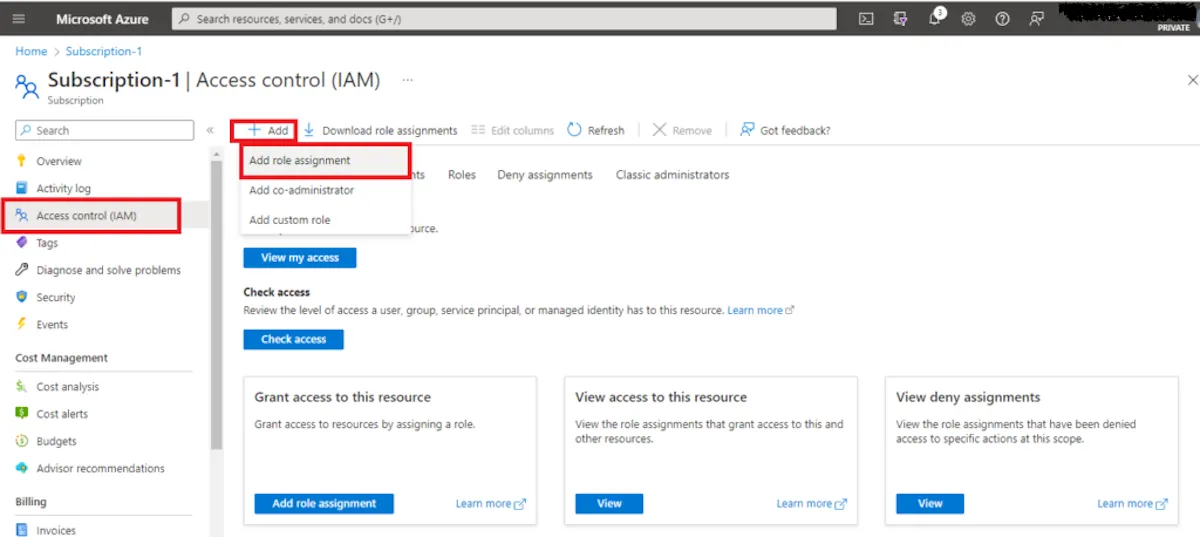
Search for Subscription again and click Access control (IAM) in the left sidebar menu of the Subscription, then click Add > Add role assignment.
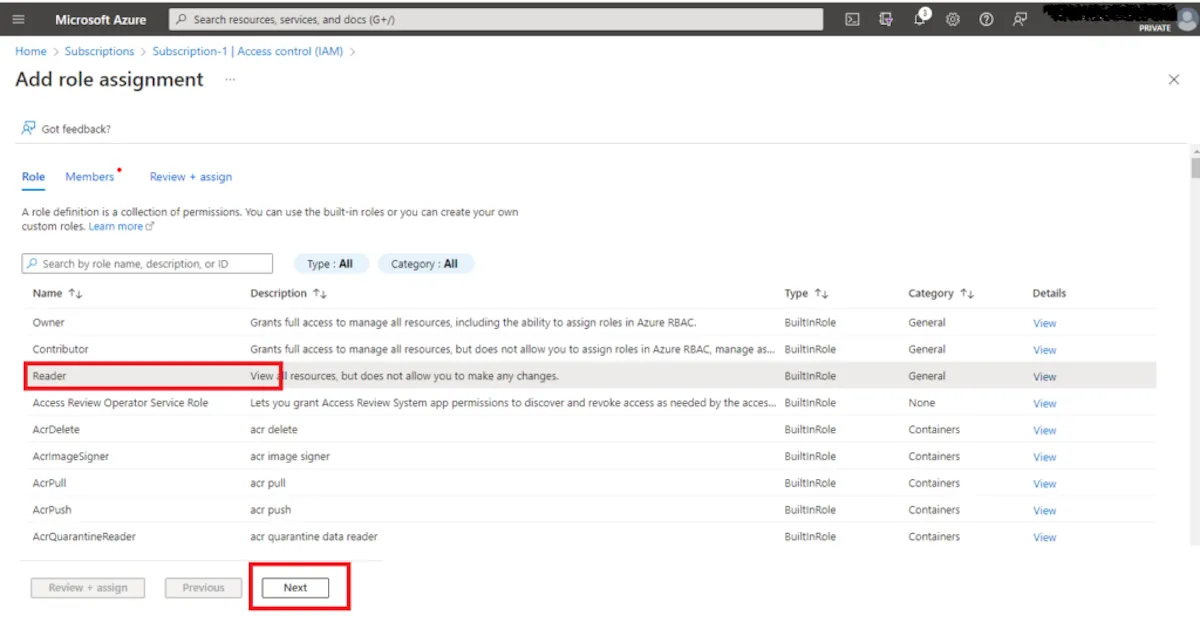
Select the Reader, Billing Reader, and Reservation Reader roles, then click Next:
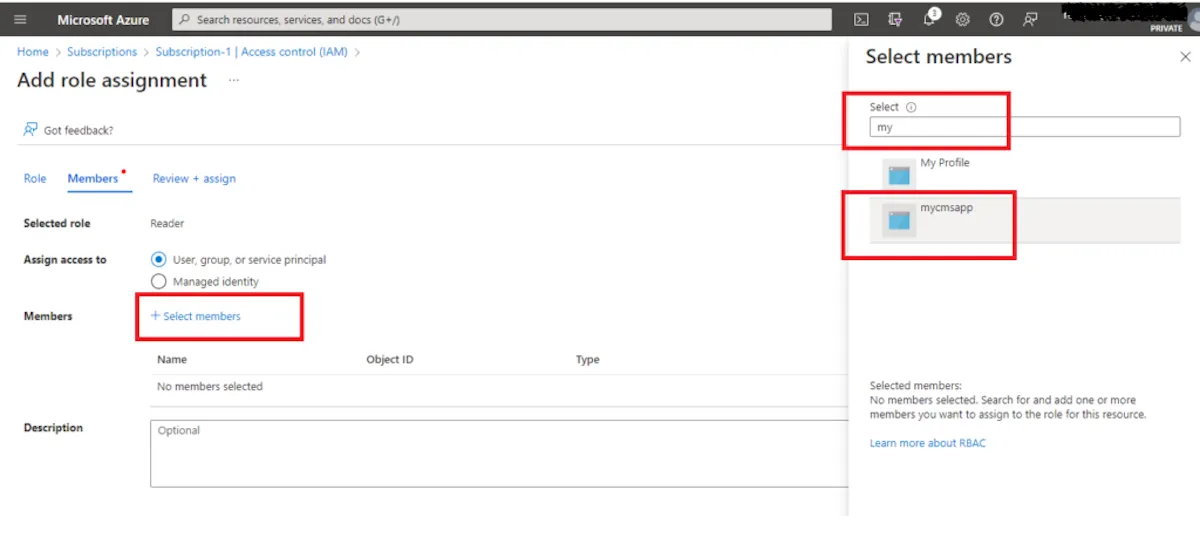
Under the Members tab, click Select members, then search for the App Registration that was created. Afterwards, click Review + assign:
NOTE: This procedure must be performed for each Subscription.
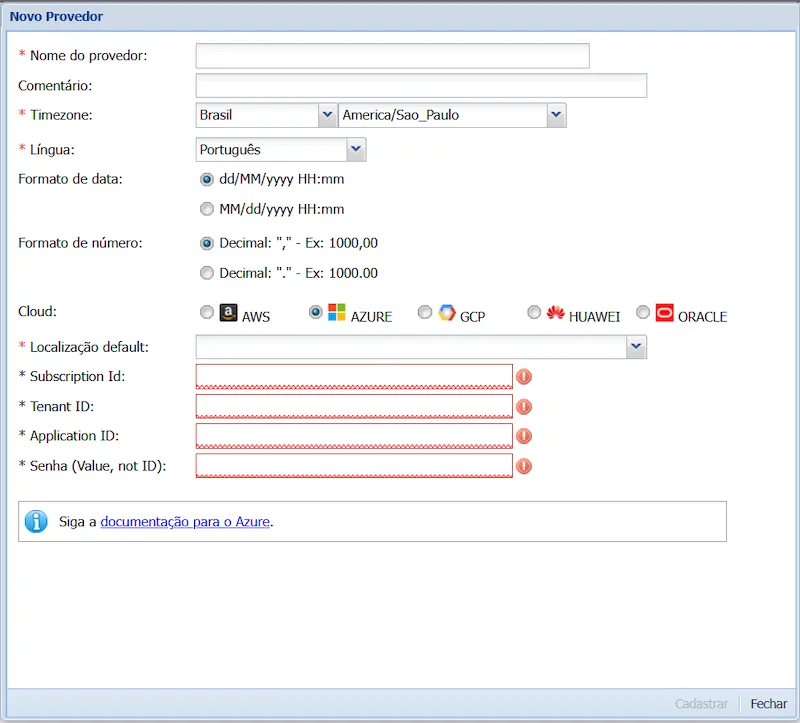
Done! You have configured the Service Principal and are ready to associate it with Cloud8. Fill in the fields using the data collected in the previous steps:
- Subscription ID = SUBSCRIPTION ID
- Tenant ID = TENANT ID
- Application ID = APPLICATION ID
- Password = SECRET VALUE
Configuring FinOps Analytics in Cloud8 #
This step is manual and handled by our team.
Enabling Best Practices in Cloud8 #
Once the FinOps Analytics configuration is complete and the data has been synchronized in Cloud8, you will be able to enable the Best Practices feature in Cloud8.
Best Practices is an advanced advisor that combines over 1,000 unique security, backup, compliance, and cost-reduction rules for AWS, Azure, GCP, and OCI with flexible alerts via Teams, Slack, or email.
In the Cloud8 sidebar menu, select Providers. Select the desired provider and click “Best Practices”.
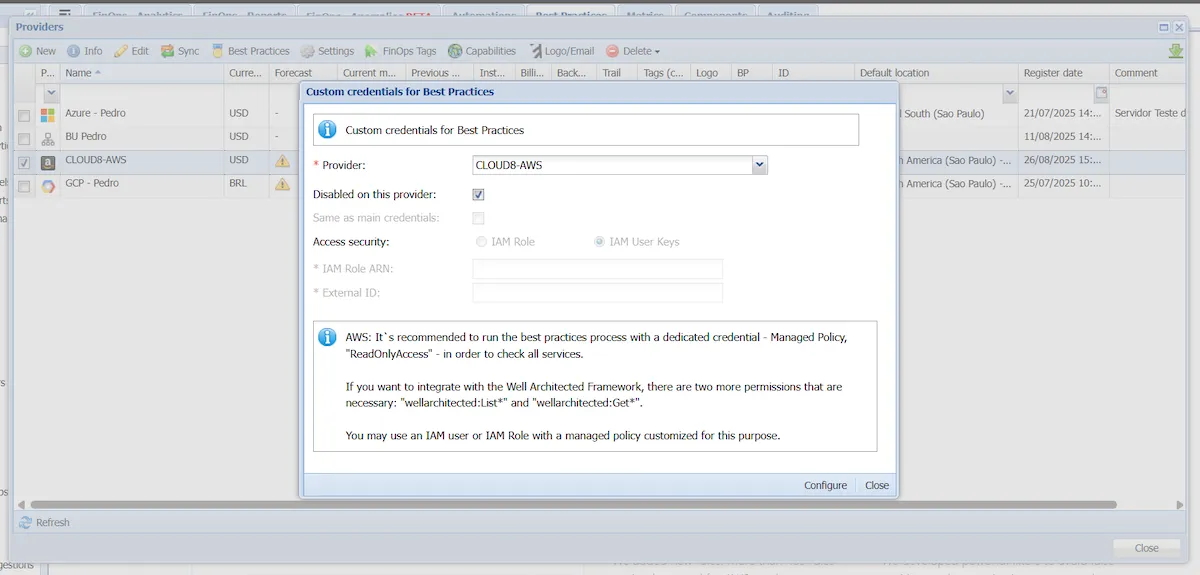
You must select the providers on which you want to enable the feature. To do this, uncheck the “Disabled on this provider” checkbox and select the “Same as main credentials” option.
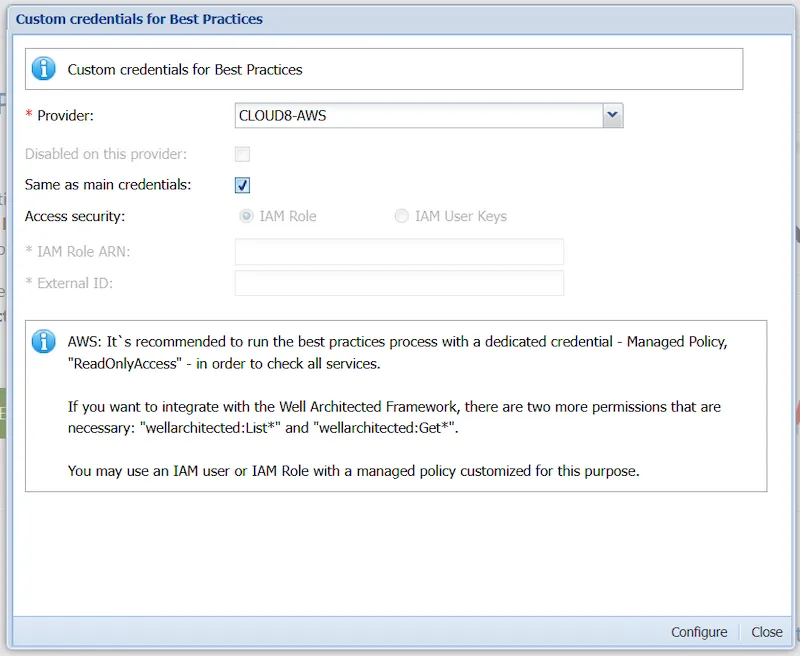
Then click “Configure”.
NOTE: If FinOps Analytics has just been enabled, you will need to wait at least 24 hours before you can enable the Best Practices feature.


