
Performing a backup with Lock / Unlock Governance (AWS) is quite simple. Just follow the instructions below when editing an existing backup routine or creating a new one.
Backup workflow #
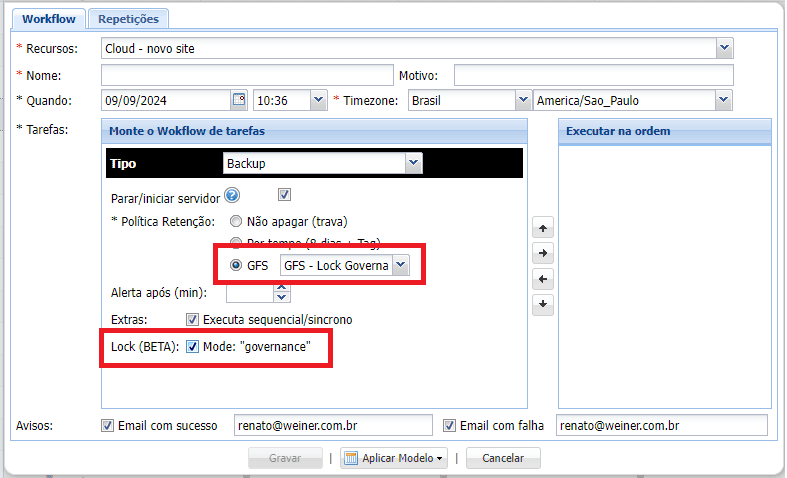
This option, which is not checked by default, is available in the Workflow creation and editing screen when selecting the Backup Type.
GFS retention policy #
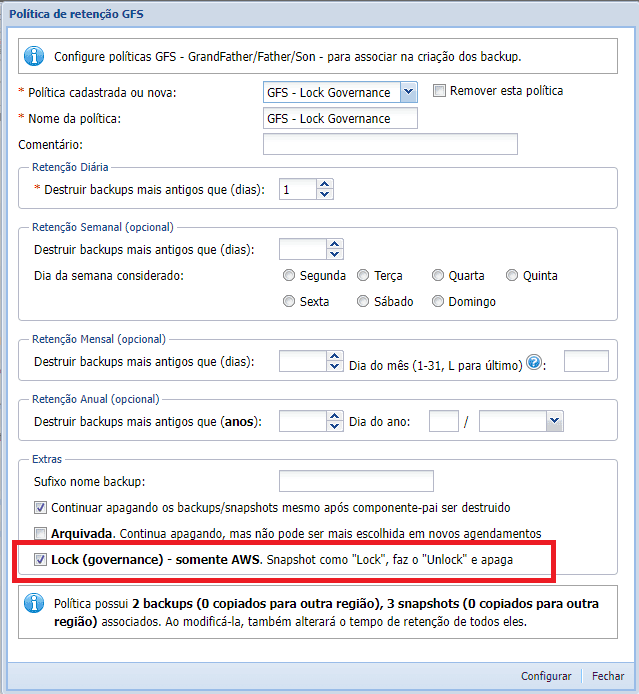
For the GFS (Grandfather / Father / Son) routine to work, its Retention Policy must also be configured to use “Lock / Unlock” — this is important to maintain governance control.
- Find the Components option in the menu, go to Backups, and click on GFS Retention. You will see the screen below.
- Check the option highlighted in the image and click Configure.
Additional credential permissions #
You need to add permissions to the access credential in order to use the Lock / Unlock feature. Add the following lines:
ec2:LockSnapshot
ec2:UnlockSnapshot
Component Lists #
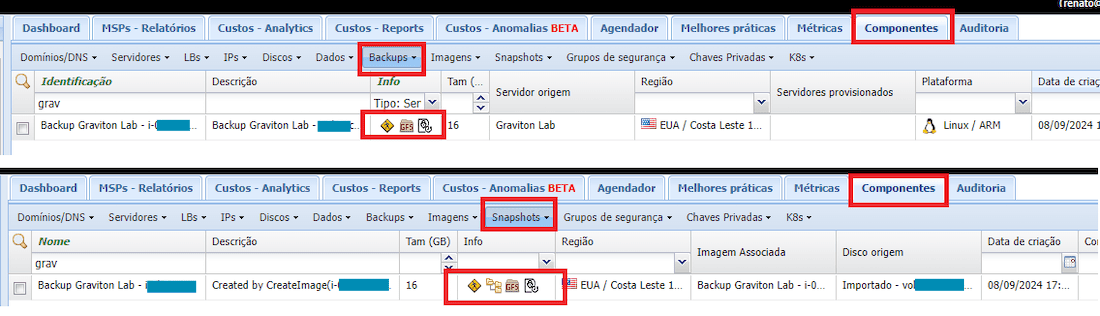
You can view which Backups and Snapshots are configured to use Lock Governance in the Components lists, as shown in the image below.
It is worth noting that by right-clicking on these inventory items, you will access the contextual menu that allows you to perform actions, such as getting detailed information, destroying, or exporting an item to a bucket.
Manual backup actions #
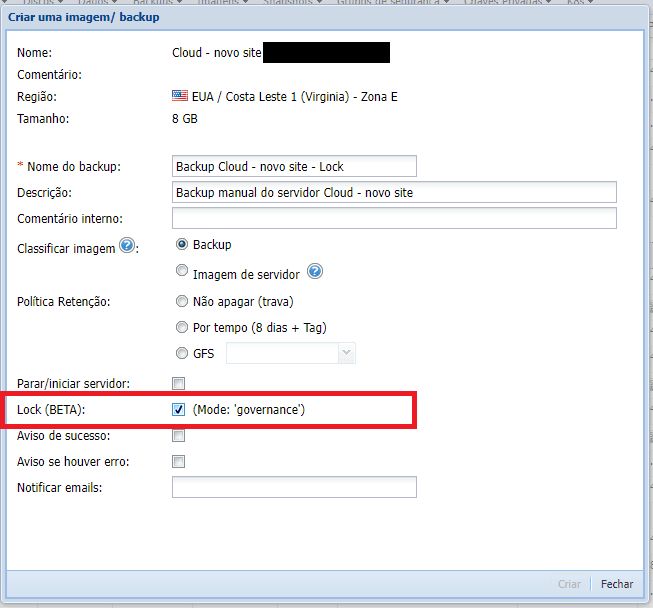
When performing a backup via the components list using the contextual menu (either for a disk or a server), the ‘Lock‘ option will also be present, as seen in the image below:
NOTE: When a Backup or Snapshot has the Lock configuration active and is removed, the Audit tab displays a warning message about the action.


