
SSO (Single Sign On) is a secure authentication method that allows users to log in without having to repeat the process multiple times. Cloud8 currently supports the following platforms:
- Azure AD
- AWS SSO
- Google Suite
- Github
- Centrify/CyberArk
- JumpCloud
- Okta
To enable Azure Single Sign On (SSO) on the Cloud8 Platform using Active Directory (AD), the user must send us an XML file and 3 URLs generated directly in the Azure interface.
Configuring SSO in Azure AD #
The steps to generate and configure these assets are as follows:
- Access the Azure Portal;
- Search for Microsoft Entra ID;
- Click on Enterprise Application to configure SAML-based SSO;
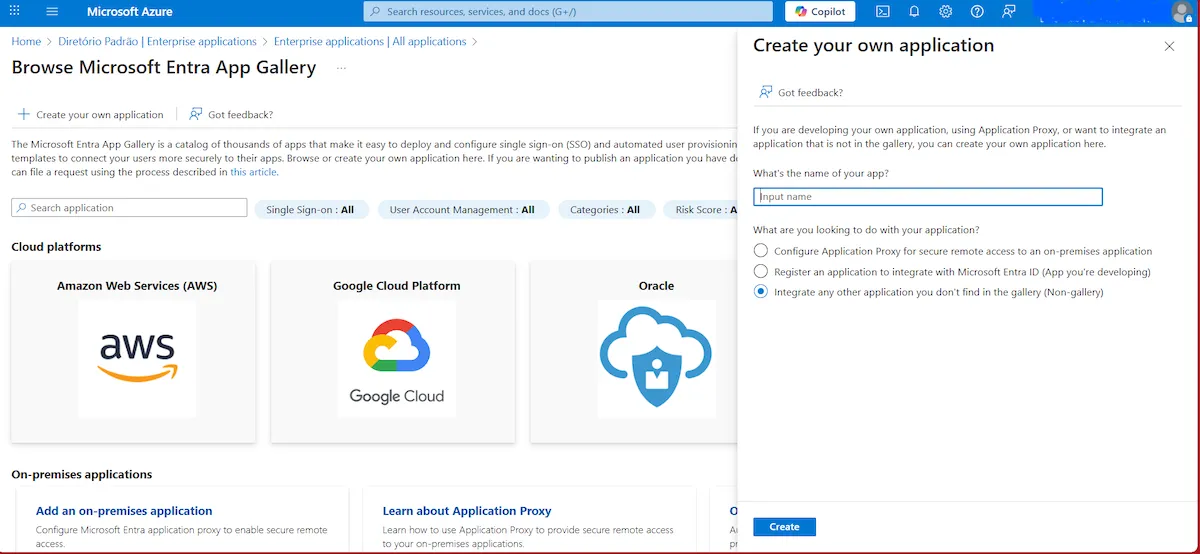
- Click on “Create your own application”.
- Select the “Non-gallery application” option.
- Set a name for the application and click “Create”.
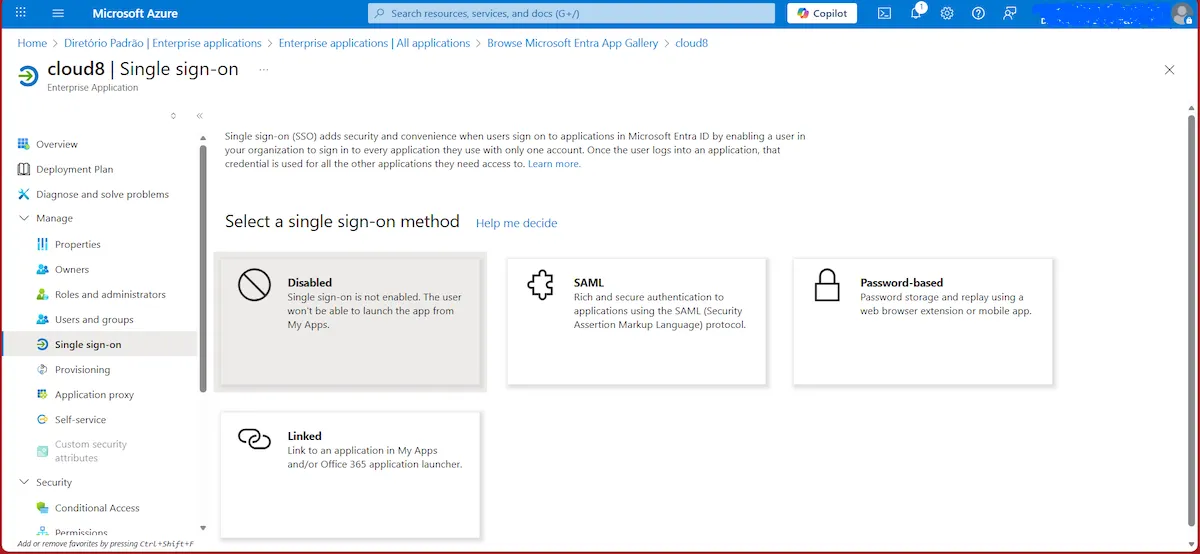
Select the created application, and in the left sidebar menu, click on “Single sign-on”. Choose the SAML option.
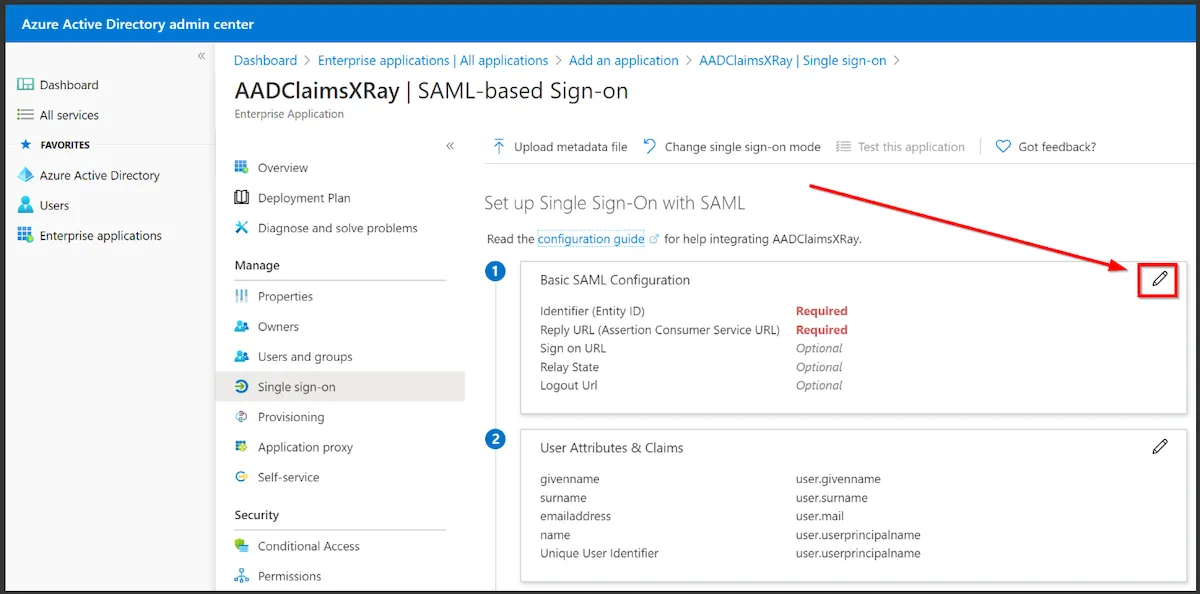
Next, click the edit icon under “Basic SAML Configuration” (Item 1 on the Panel)
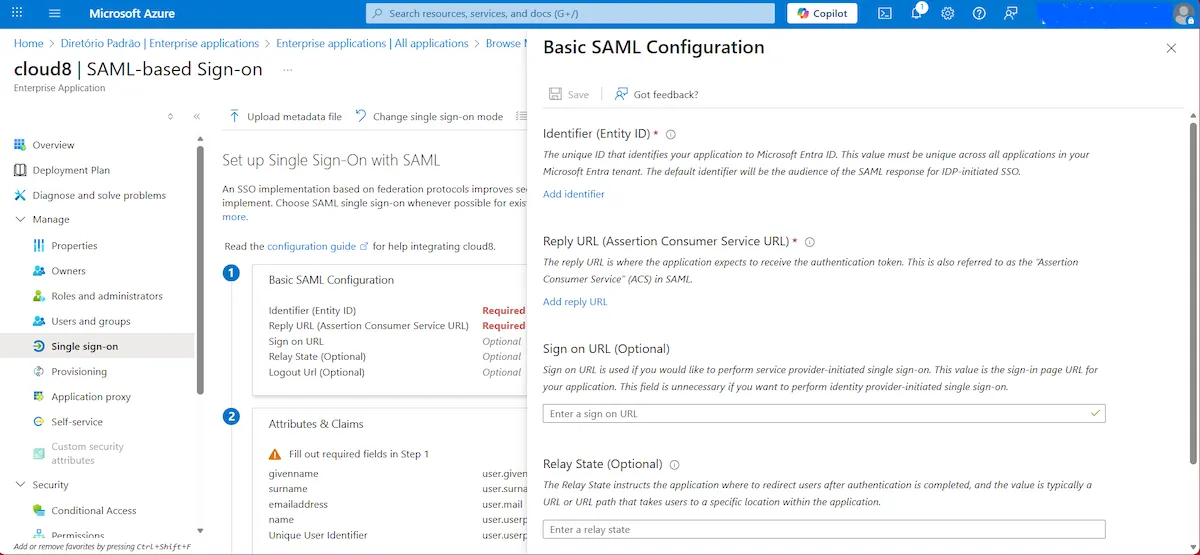
The Identifier is a unique ID used to identify the application in Microsoft Entra ID. The Cloud8 Platform suggests adopting the following naming convention:
“https://sso.webpanel.cloud/azure/APP_NAME“
Enter the full URL, not a short value.
Note: The Identifier field must contain exactly the full URL above (https://sso.webpanel.cloud/azure/APP_NAME), and not just a short name/slug.
The Reply URL is where the application expects authentication and the token with the claim to be sent. Just like with the Identifier, Cloud8 will provide a URL to be used as the Assertion URL in the “Reply URL” option in the following format:
“https://sso.webpanel.cloud/azure/APP_NAME“
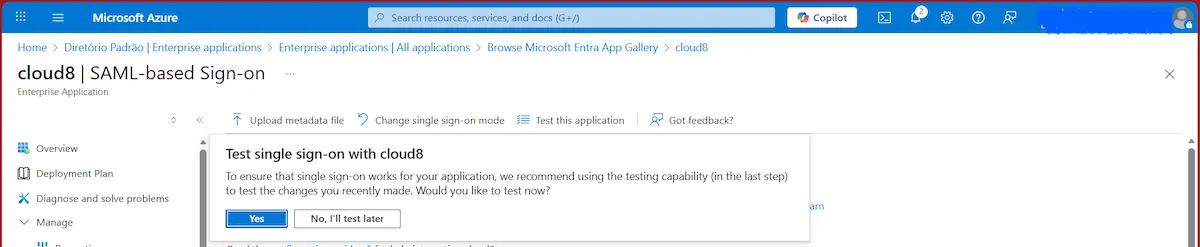
Afterwards, click “Save” to save the configuration. Then, click “No, I’ll test later”.
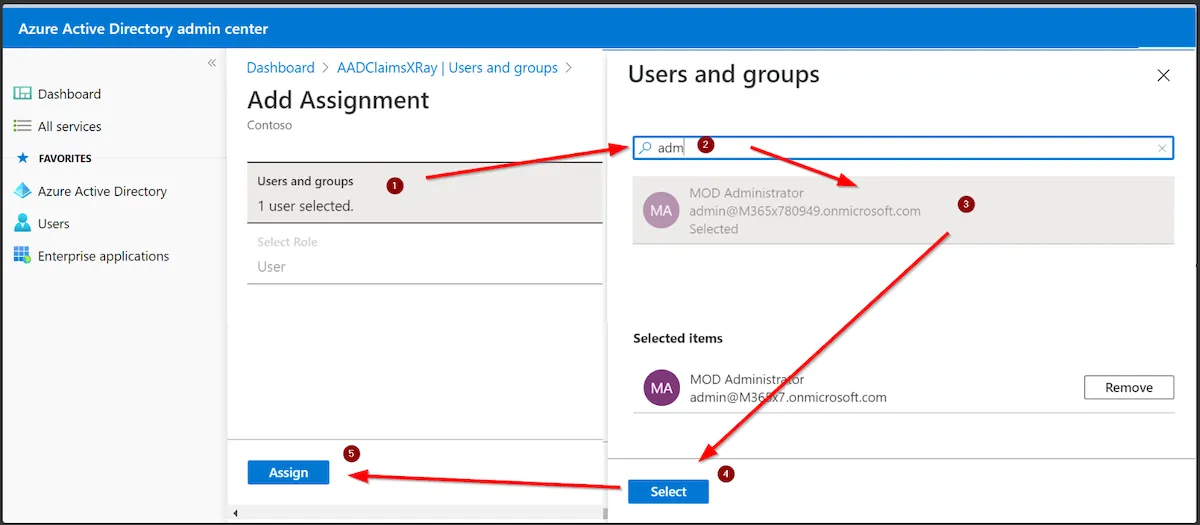
Next, add the users who will use SSO and click “Assign”.
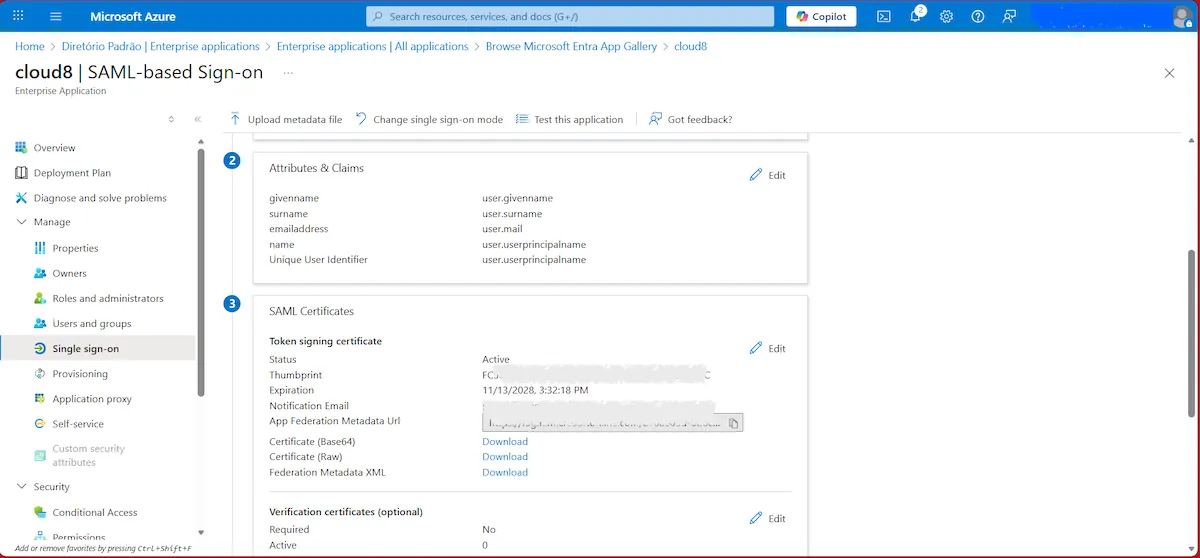
Under SAML Certificates (Item 3 on the Panel), find the “Federation Metadata XML” option and click “Download”.
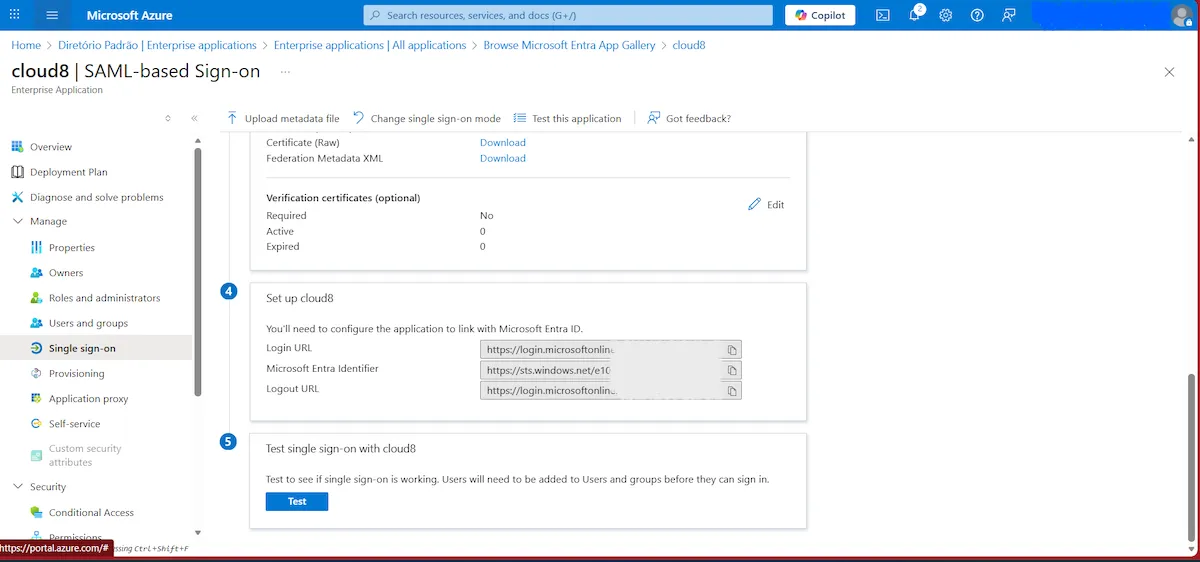
In “Set up” (Item 4 on the Panel), you will need to copy each of the URLs below and provide them in the next step.
Finalizing SSO Configuration in Azure AD #
After configuring SSO, send an email to suporte@cloud8.com.br with the subject “Enable Azure SSO” and provide the following details:
- Identifier defined in Basic SAML Configuration
- Login URL, Microsoft Entra Identifier, and Logout URL from Set up
- Federation Metadata XML exported under SAML Signing Certificate
IMPORTANT! Don’t forget to identify your Cloud8 account in the email if you have more than one account configured to use Azure SSO.


